
Browse the operator manual
Start here
Get started with Operations CenterTake a trip from Draft to departureUse Dashboard and RadarVideo guidesOrganization setup
Set up your organizationSet company identity and portal brandingSet editor, schedule, and writing defaultsConfigure traveler forms, legal content, and the public catalogConfigure payment providers and payment documentsConfigure automatic emailSet monitoring and notification thresholdsCreate and build
Create a tripImport a trip with AIComplete trip details and residencesBuild the itineraryAdd flights and transfersAssign field staff and partnersPublish and sell
Configure and publish the traveler portalDesign the traveler pageGive and remove portal accessConfigure pricing and collect paymentsReview and approve join requestsManage travelers and roomingWork with sales and FinancePrepare and operate
Prepare a trip for departureManage files and messagesMonitor live operationsSaved content and contacts
Reuse saved trip contentMaintain field staff, partners, and suppliersReference
Trip status referenceManage the tour listFix common problemsCreate and build
Complete trip details and residences
Set the trip dates, description, accommodation nights, and room types, and save your work safely.
Before you begin
- A Draft trip
You will learn to
- Complete Tour Details
- Add residences and room types
- Save and handle edit locks
Reviewed September 2026
Tour Details
- Enter the Tour Name and a unique Tour Code.
- Set the Start Date and Length. The end date is calculated.
- Choose the Primary Country and Timezone.
- Write the trip description. Keep day-by-day detail for the itinerary.
- Select Save Tour.
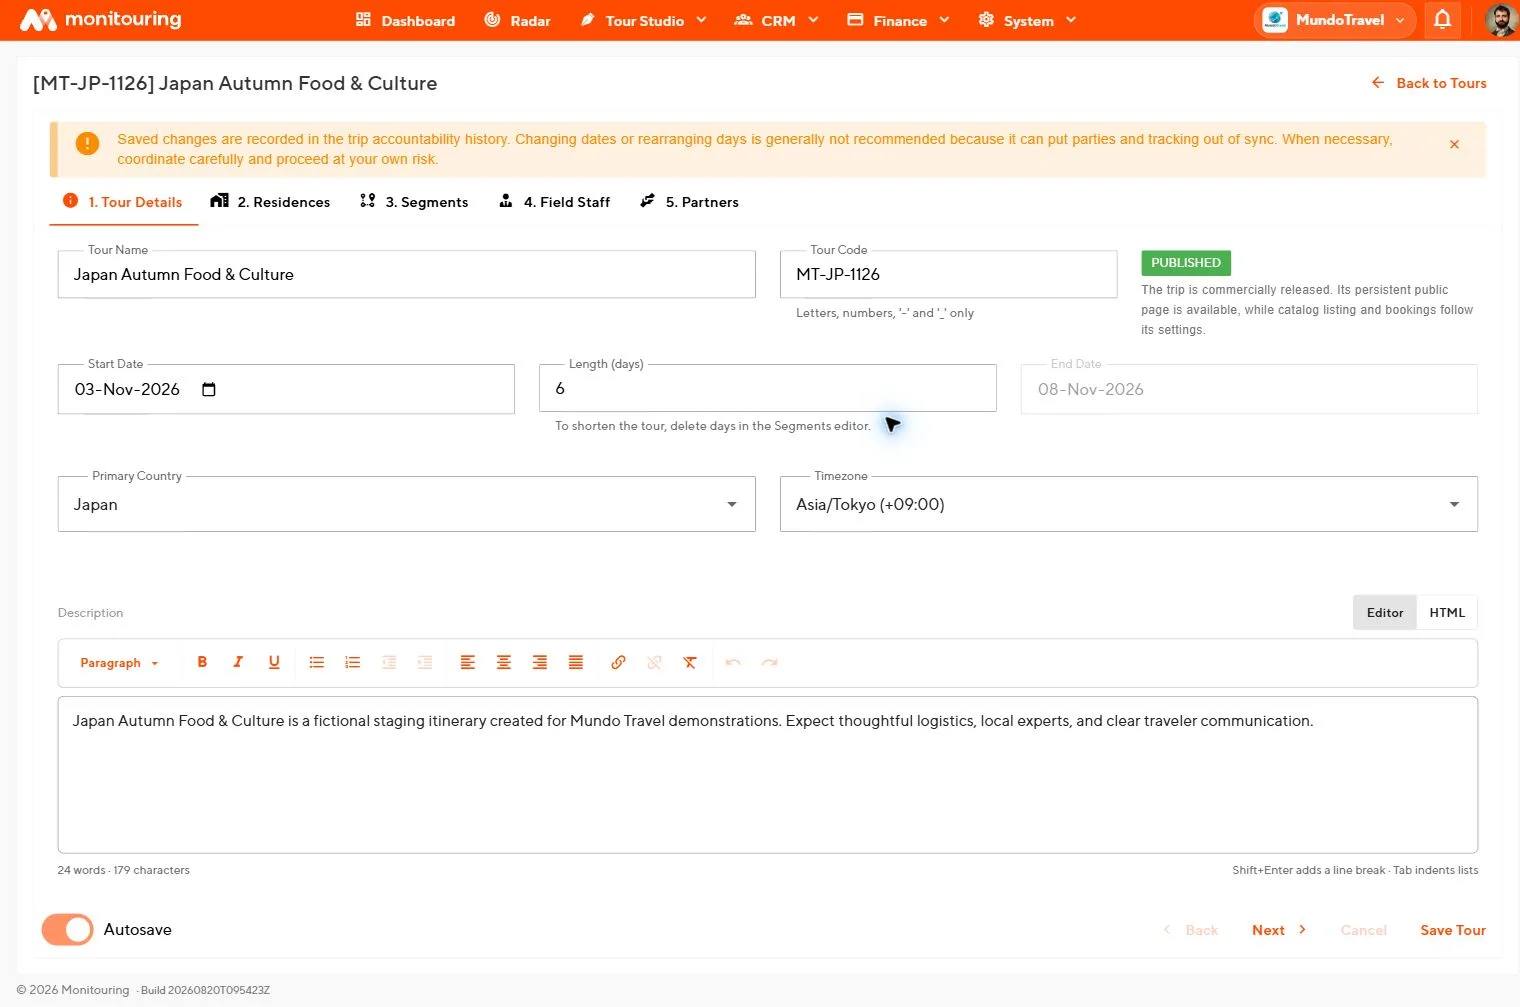
Changing the start date or length after travelers have booked affects residence nights, segments, room upgrades, prices, and the traveler page. Make date changes before selling where possible.
Saving
With Autosave on, the editor saves every minute. Select Save Tour before you leave the editor or open the traveler preview.
Only one operator edits a trip at a time.
- If another operator holds the edit lock, wait or ask them to finish.
- If you lose the lock, select Re-acquire and save. Your unsaved work stays on screen.
- If the editor reports newer changes from another session, reload the trip and repeat your change.
Residences
- Open Residences and select add.
- Pick the location on the map.
- Enter the name, address, website, phone, check-in and check-out times, description, photos, and star rating.
- In the residence timeline, set the first night and number of nights.
- Open Room Management and add each room type. Mark the included room type as the default.
- Add the supplier if you track one.
- Save, then drag residences into trip order.
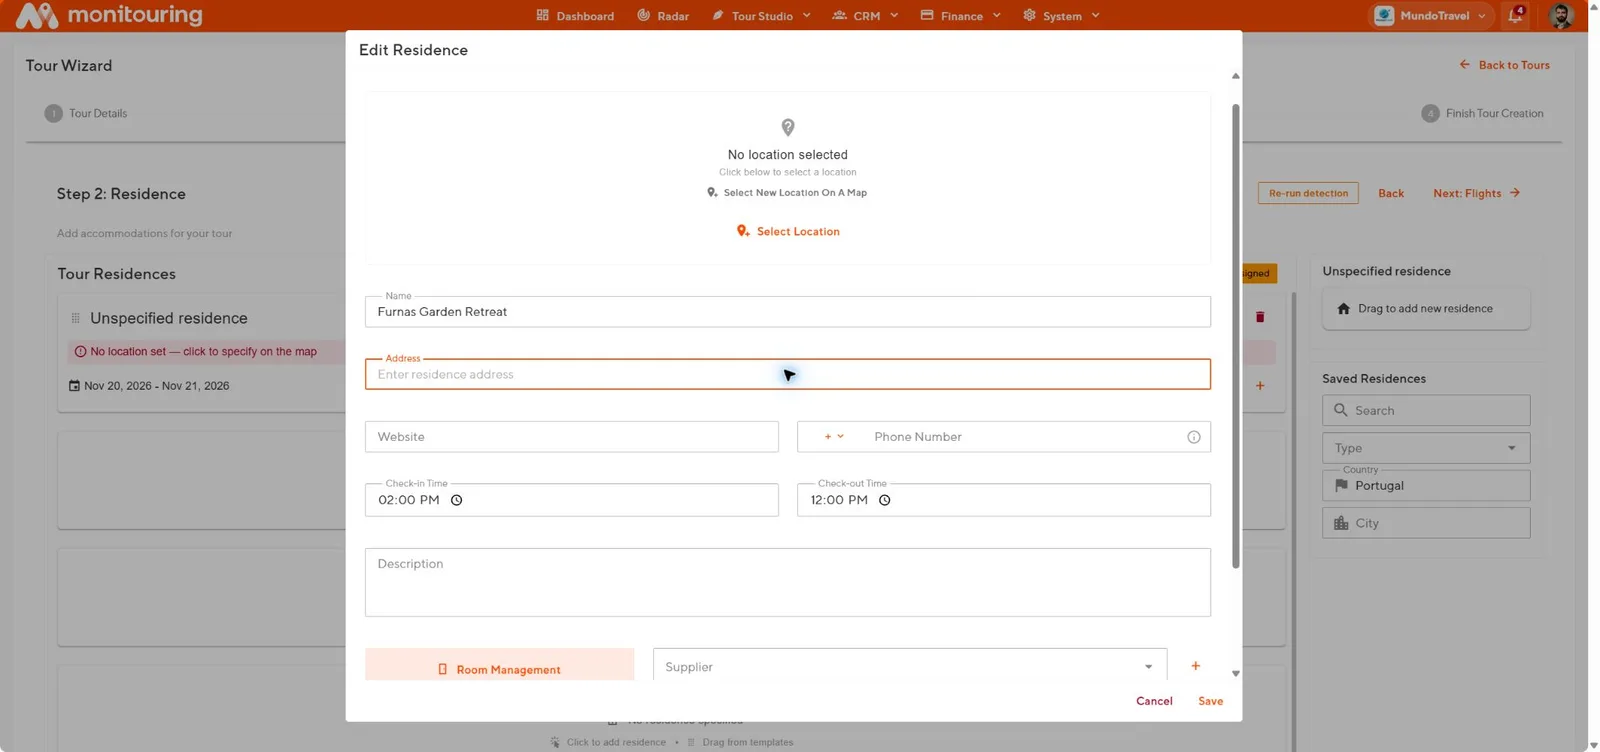
Room types
Give each room type a clear traveler-facing name and set its occupancy options, such as single, double, twin, or triple. Add a price per person per night for upgrade rooms only. Mark room types that are not available for this trip as unavailable.
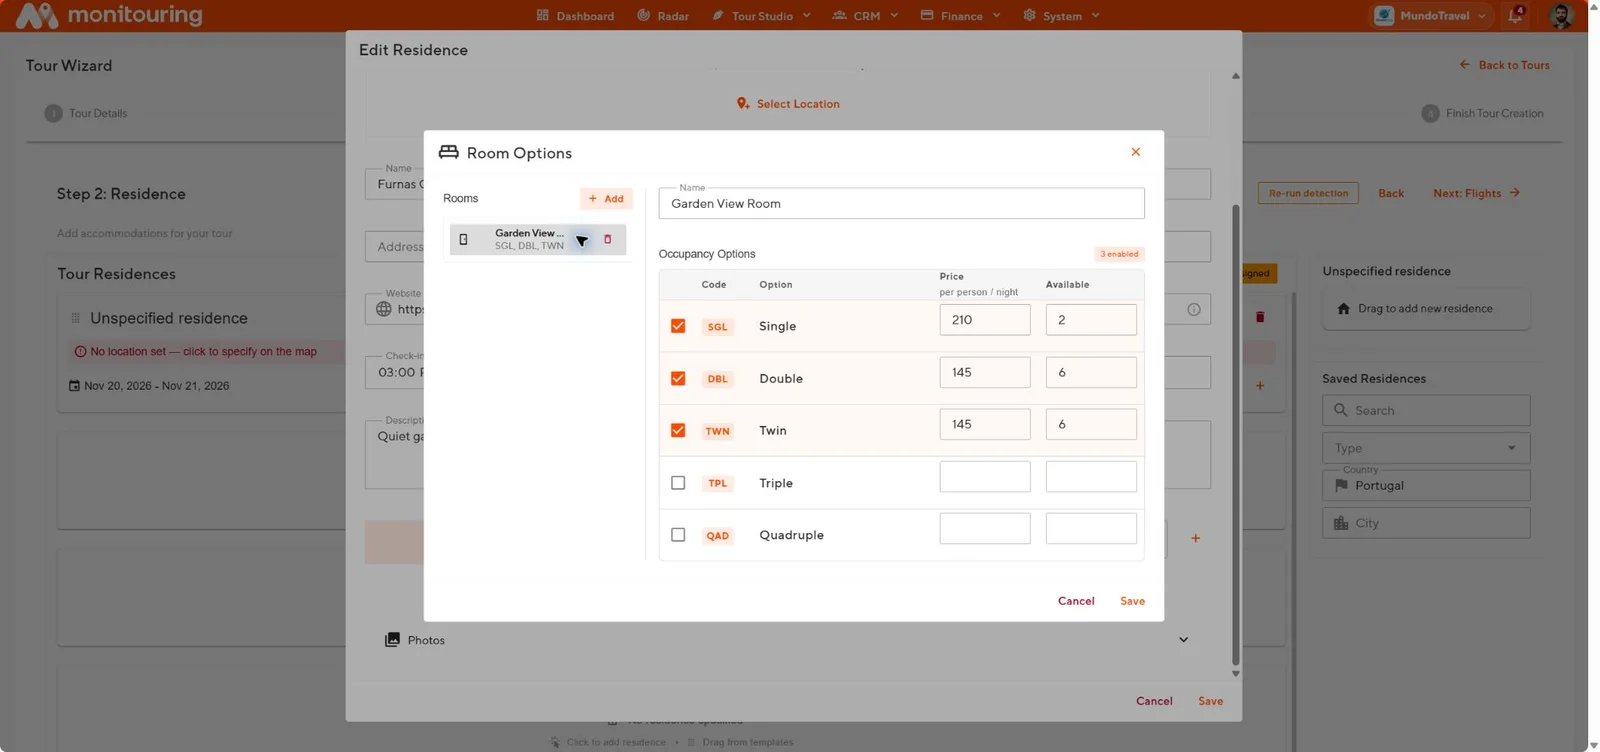
To reuse a residence on other trips, select its save option. Saved residences appear under Tour Studio → Residences.
The trip shows the correct code, dates, and country, and every residence has valid nights and at least one room type.