
Browse the operator manual
Start here
Get started with Operations CenterTake a trip from Draft to departureUse Dashboard and RadarVideo guidesOrganization setup
Set up your organizationSet company identity and portal brandingSet editor, schedule, and writing defaultsConfigure traveler forms, legal content, and the public catalogConfigure payment providers and payment documentsConfigure automatic emailSet monitoring and notification thresholdsCreate and build
Create a tripImport a trip with AIComplete trip details and residencesBuild the itineraryAdd flights and transfersAssign field staff and partnersPublish and sell
Configure and publish the traveler portalDesign the traveler pageGive and remove portal accessConfigure pricing and collect paymentsReview and approve join requestsManage travelers and roomingWork with sales and FinancePrepare and operate
Prepare a trip for departureManage files and messagesMonitor live operationsSaved content and contacts
Reuse saved trip contentMaintain field staff, partners, and suppliersReference
Trip status referenceManage the tour listFix common problemsPublish and sell
Manage travelers and rooming
Add or import travelers, read the Booking Summary, assign rooms, and email or export the roster.
Before you begin
- Residences and room types entered
You will learn to
- Add or import travelers
- Read the Booking Summary
- Assign rooms
- Email and export the roster
Reviewed September 2026
The Travelers workspace has tabs for the roster, Rooms, Booking Summary, Join Requests, and Imports. Travelers reach the roster by direct entry, import, or an approved join request.
Add a traveler
- Select add and search by name or email.
- Select the existing person, or create a new one.
- Mark the head traveler for a group.
- Save.
Import a list
- Open Imports and add an Excel, CSV, PDF, or image file, or paste text.
- Review the extracted travelers and room requests.
- Enter the primary contact’s name, email, and phone.
- For each possible duplicate, choose the existing person or create a new one.
- Apply the import.
- Check the roster count, names, emails, and requested rooms.
Read the Booking Summary
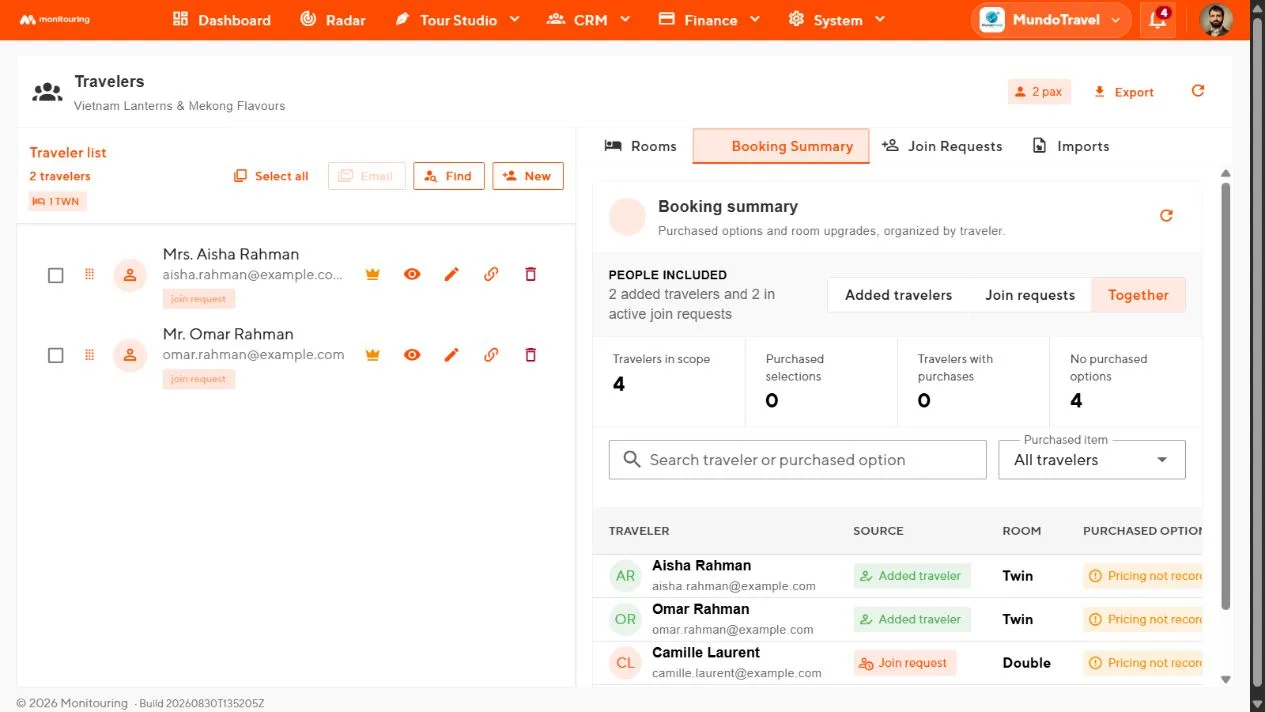
Open Booking Summary to compare travelers with their room choice, purchased options, and booking source.
- Choose Added travelers, Join requests, or Together.
- Read Travelers in scope, Purchased selections, Travelers with purchases, and No purchased options.
- Open the related join request when a price or selection needs explanation.
- Refresh after approvals, amendments, or room changes.
Assign rooms
- Open Rooms and choose the whole trip or one residence.
- Add the rooms available to the group and set each room’s type and occupancy.
- Drag travelers into rooms.
- Fill open spots and place travelers without a room.
- Apply upgrades where a traveler chose one and check the price.
- Repeat for each residence.
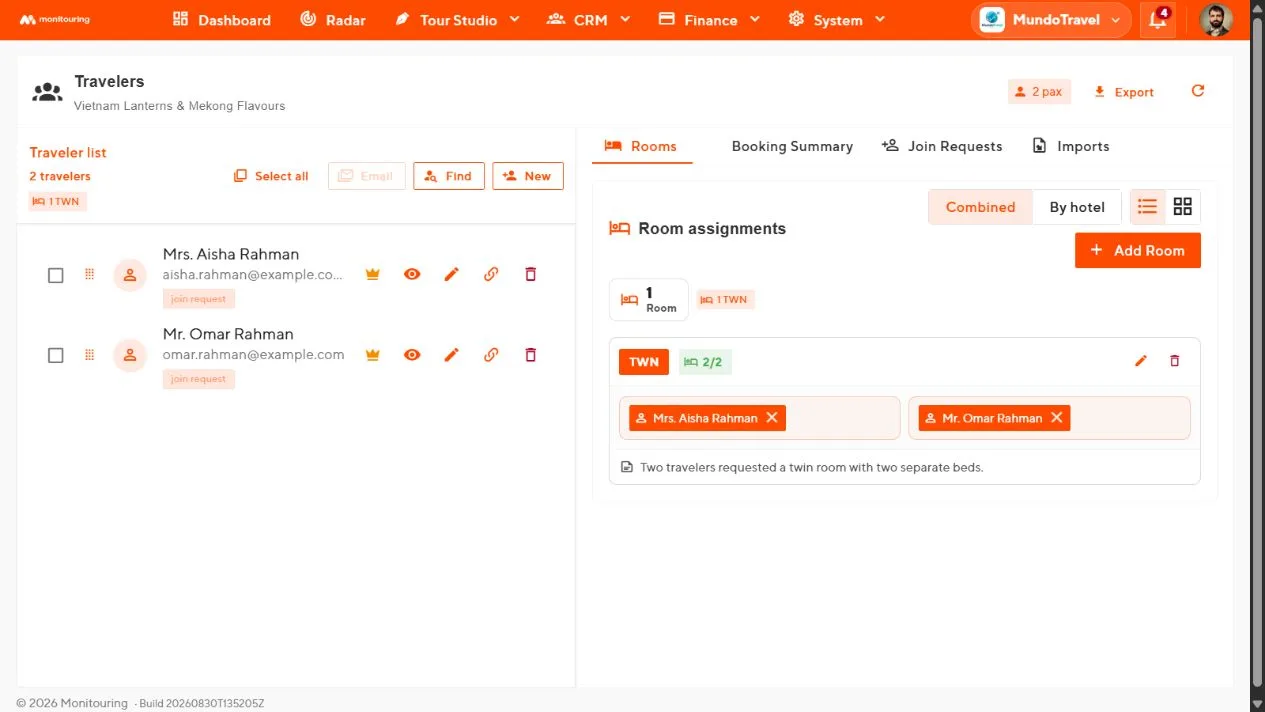
When rooms change after travelers were notified, use Prepare rooming list update to review and send the update email.
Review rooms again after any change to dates, residences, room types, or the roster.
Email travelers
- Select the travelers.
- Select Email and choose the topic.
- Review each personalized message, its language, and attached files.
- Send.
Export
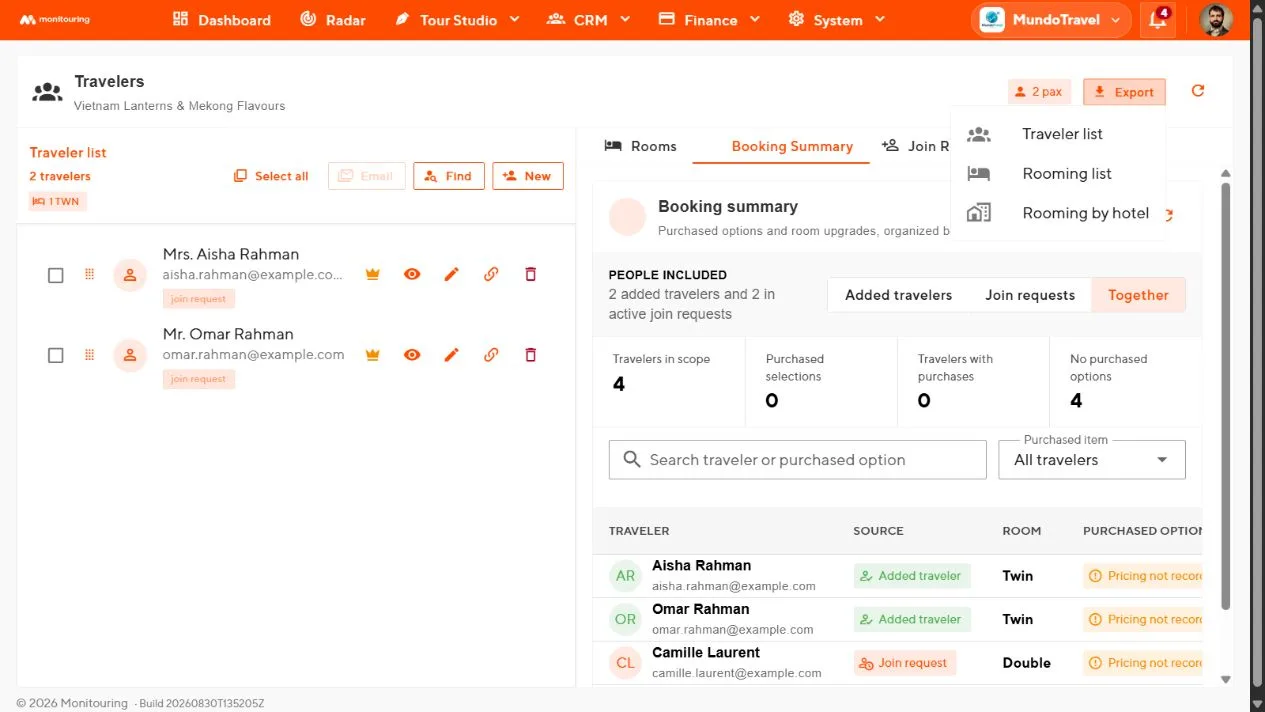
Select Export and choose Traveler list, Rooming list, or Rooming by hotel.
The roster, rooms, and Booking Summary agree, with no open spots or unplaced travelers.