
Browse the operator manual
Start here
Get started with Operations CenterTake a trip from Draft to departureUse Dashboard and RadarVideo guidesOrganization setup
Set up your organizationSet company identity and portal brandingSet editor, schedule, and writing defaultsConfigure traveler forms, legal content, and the public catalogConfigure payment providers and payment documentsConfigure automatic emailSet monitoring and notification thresholdsCreate and build
Create a tripImport a trip with AIComplete trip details and residencesBuild the itineraryAdd flights and transfersAssign field staff and partnersPublish and sell
Configure and publish the traveler portalDesign the traveler pageGive and remove portal accessConfigure pricing and collect paymentsReview and approve join requestsManage travelers and roomingWork with sales and FinancePrepare and operate
Prepare a trip for departureManage files and messagesMonitor live operationsSaved content and contacts
Reuse saved trip contentMaintain field staff, partners, and suppliersReference
Trip status referenceManage the tour listFix common problemsPublish and sell
Design the traveler page
Arrange blocks, choose images, and preview the traveler page on desktop and mobile.
Before you begin
- Trip details, itinerary, residences, and pricing entered
- Public images uploaded to Files
You will learn to
- Choose and order blocks
- Adjust block layout and images
- Preview desktop and mobile
Reviewed September 2026
The page builder controls how the page looks. Dates, itinerary, residences, staff, rooms, and prices come from the trip itself. To change those, edit the trip.
Order the page around the traveler’s questions
- What is the trip, where, and when?
- Why choose it?
- What happens each day?
- Where will I stay and what is included?
- What does it cost and what are the terms?
- How do I book?
Blocks
| Block | Shows |
|---|---|
| Hero header | Title, destination, dates, main image |
| Section menu | Links to sections on long pages |
| Overview and Custom text | Trip story and context |
| Highlights | Short reasons to choose the trip |
| Route map | Locations in sequence |
| Trip itinerary | Day-by-day program |
| Gallery | Additional images |
| Accommodation | Residences and room information |
| Booking details | Price and booking summary |
| Upgrades selector | Room and trip upgrades |
| Booking terms, Inclusions, Trip fit | Conditions and expectations |
| Simple booking CTA | The join button |
Layout blocks arrange content in one, two, or three columns.
Build the layout
- Start from a system preset or the current layout.
- Add blocks in the order above.
- Drag blocks to reorder.
- Select a block to open its controls and set width, spacing, background, alignment, image treatment, and variant.
- Disable a block to hide it without deleting it.
- Select Save.
If a block is linked to a reusable layout, unlink it before making a change for this trip only. Save the layout as reusable when other trips should use it.
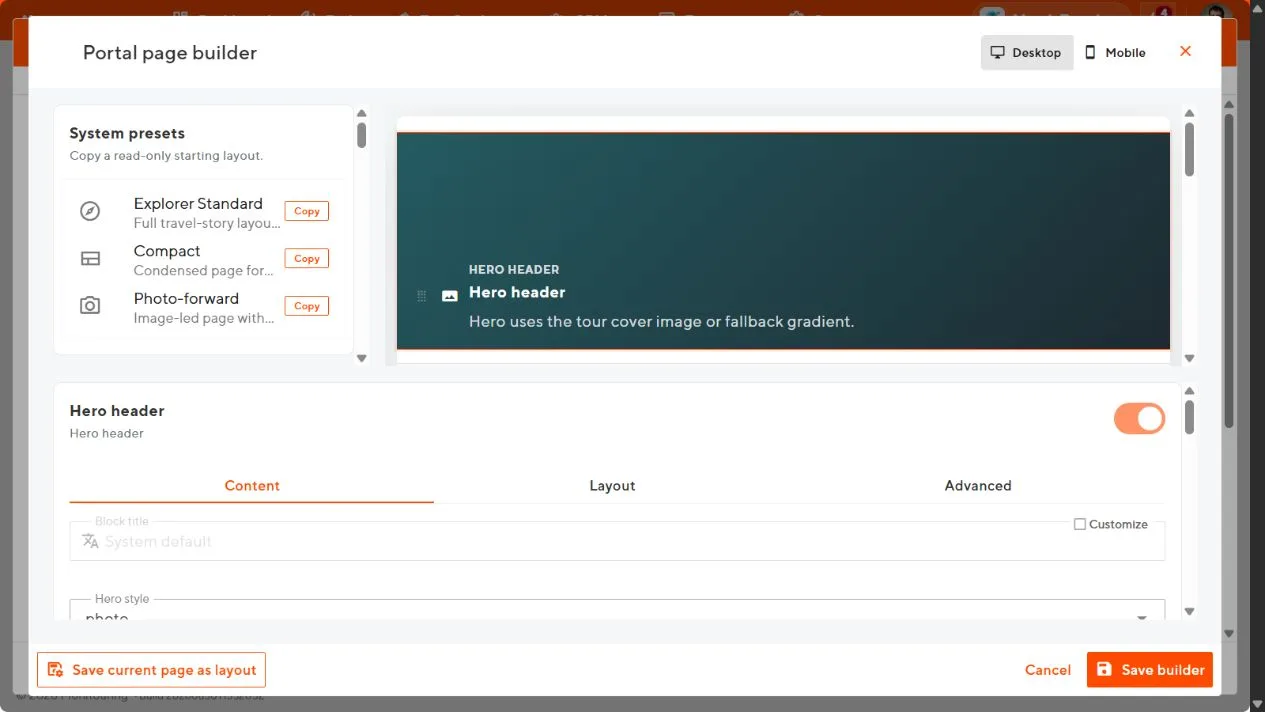
Images
Use only files marked Public in Files. Choose a hero image with a clear focal point and check that the title stays readable over it.
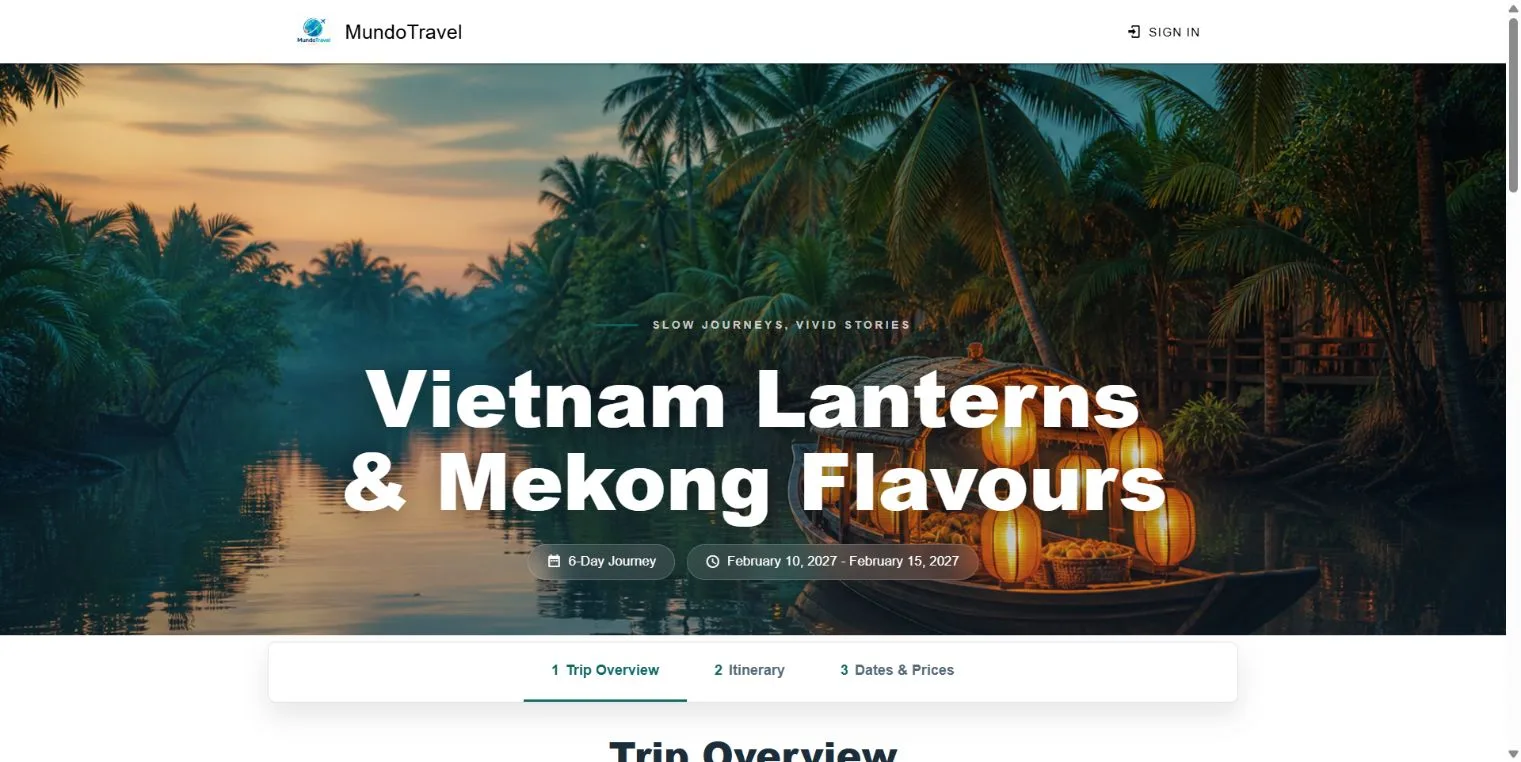
Preview
- Check the desktop preview from the hero to the booking button.
- Switch to Mobile and check image crops, columns, and long day titles.
- Save.
- Open the real page address in a private browser window.
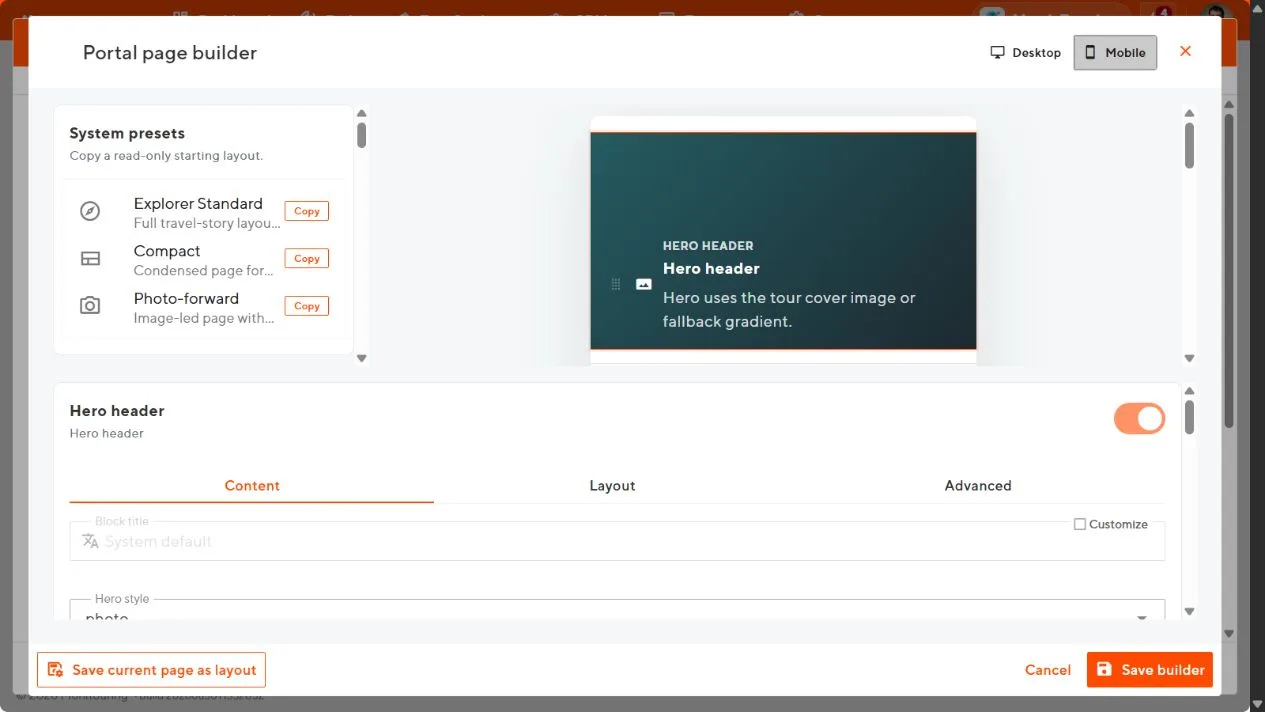
Travelers can read the trip, see the price and terms, and reach the booking button on any screen size.