
Browse the operator manual
Start here
Get started with Operations CenterTake a trip from Draft to departureUse Dashboard and RadarVideo guidesOrganization setup
Set up your organizationSet company identity and portal brandingSet editor, schedule, and writing defaultsConfigure traveler forms, legal content, and the public catalogConfigure payment providers and payment documentsConfigure automatic emailSet monitoring and notification thresholdsCreate and build
Create a tripImport a trip with AIComplete trip details and residencesBuild the itineraryAdd flights and transfersAssign field staff and partnersPublish and sell
Configure and publish the traveler portalDesign the traveler pageGive and remove portal accessConfigure pricing and collect paymentsReview and approve join requestsManage travelers and roomingWork with sales and FinancePrepare and operate
Prepare a trip for departureManage files and messagesMonitor live operationsSaved content and contacts
Reuse saved trip contentMaintain field staff, partners, and suppliersReference
Trip status referenceManage the tour listFix common problemsOrganization setup
Configure traveler forms, legal content, and the public catalog
Set booking terms, traveler agreements, form defaults, link expiry, and how visitors browse your trips.
Before you begin
- Organization administrator access
- Booking terms and agreement text
You will learn to
- Set booking terms and traveler agreements
- Choose default traveler form sections
- Turn on and design the public catalog
Reviewed September 2026
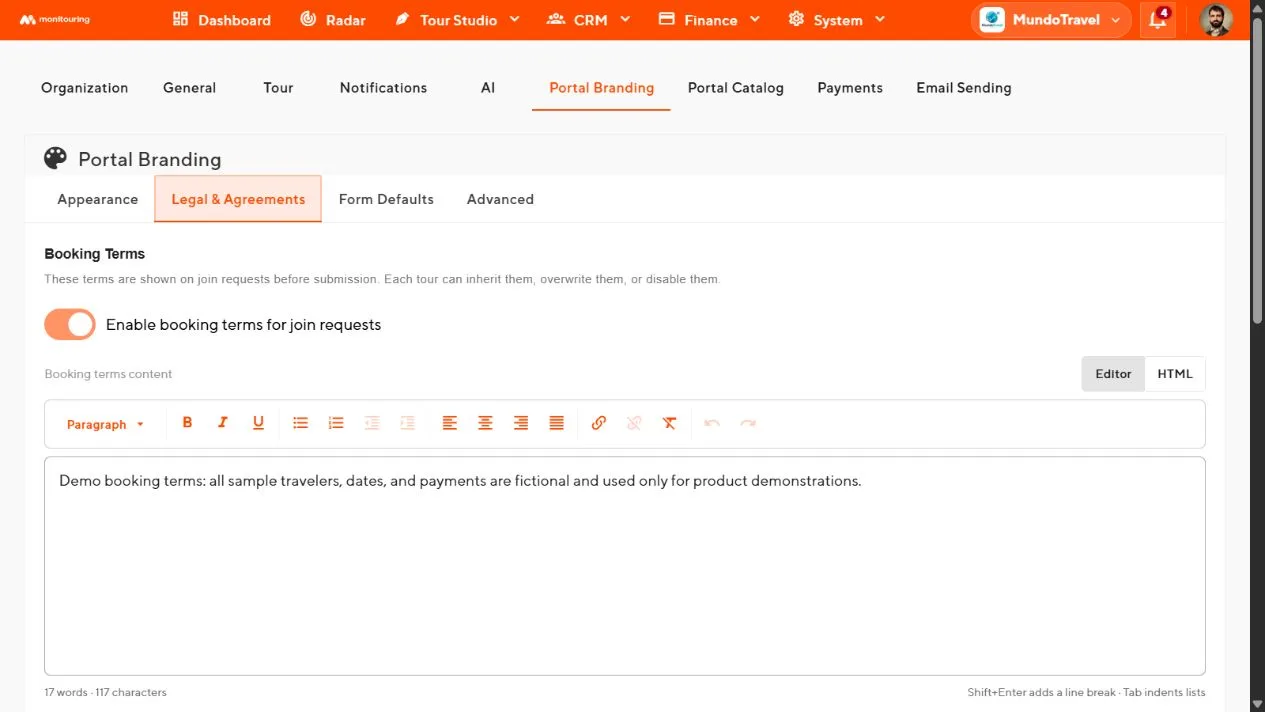
Legal & Agreements
Open Portal Branding → Legal & Agreements.
- Turn on Booking terms and paste the text travelers must see.
- Give each traveler agreement a title and body.
- Turn on only the agreements that are ready.
- Select Save.
Each trip can inherit these terms, replace them, or turn them off in its own Portal settings.
Form Defaults
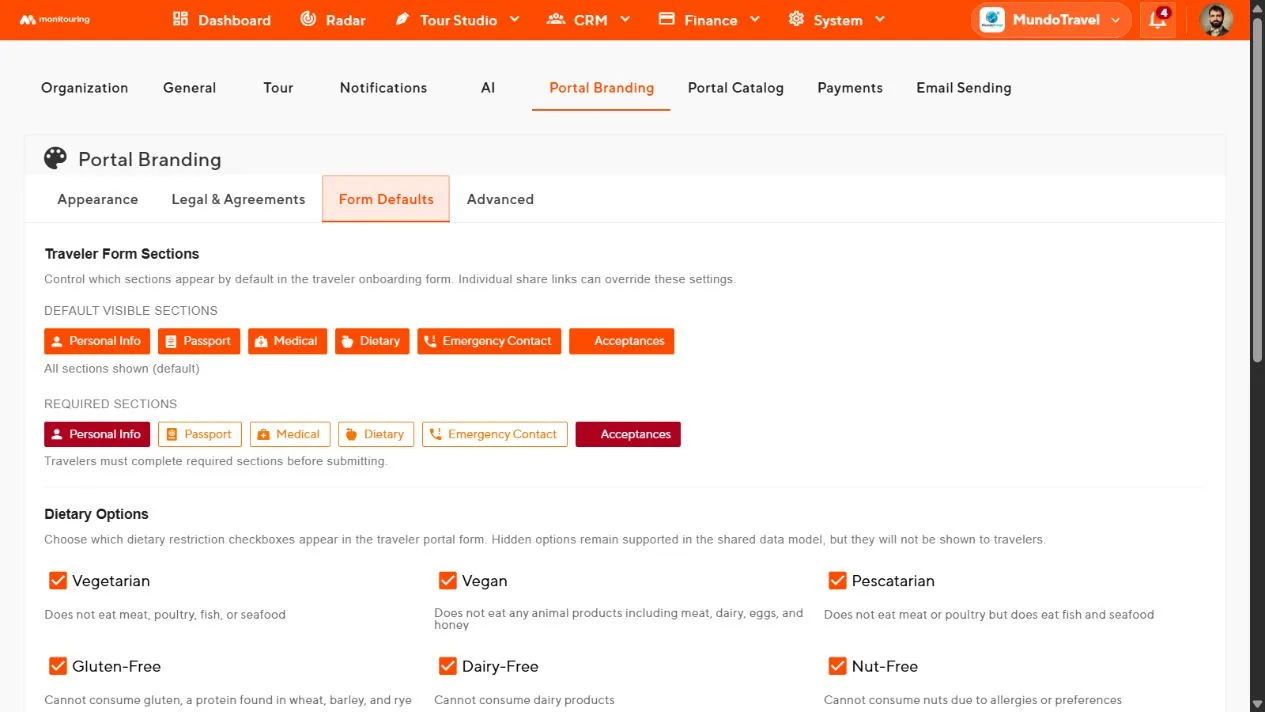
Open Portal Branding → Form Defaults. For each section, choose whether it is shown and whether it is required: Personal Information, Passport Details, Medical Questions, Medical Insurance, Dietary Information, Emergency Contact, and Required Acceptances.
| Option | Effect |
|---|---|
| Dietary Options | Dietary restrictions travelers can select |
| Enable passport photo upload | Adds a passport photo field to the passport section |
| Enable join requests | Turns on traveler applications for new trips by default |
| Latin-only traveler names | Requires traveler names in Latin characters |
| Share link expiry | Default expiry for new traveler and guest links |
Require only the information your process needs. Long required forms are hard to complete on a phone.
Advanced
The Advanced tab accepts custom header HTML, footer HTML, and CSS. Keep a copy of what you enter, and test the traveler page on desktop and mobile after saving.
Portal Catalog
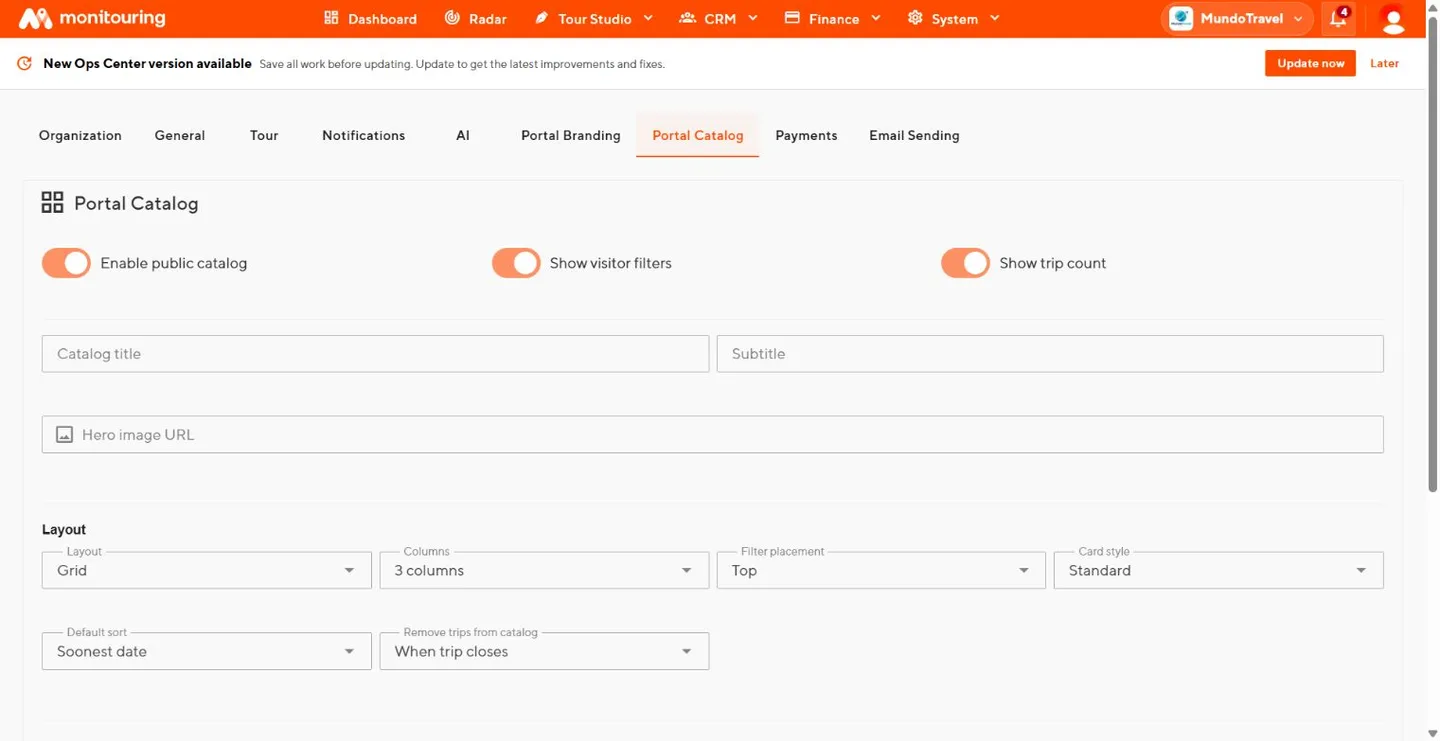
Open Portal Catalog.
- Turn on Enable public catalog.
- Enter the Catalog title, Subtitle, and Hero image URL.
- Choose the Layout, Columns, Card style, Filter placement, and Default sort.
- Turn on Show visitor filters and choose from Search, Country, Date range, Duration, and Sort.
- Choose the card details: Image, Summary, Dates, Duration, Country, and Price.
- Under Remove trips from catalog, choose when trips leave the list.
- Select Save.
Each trip also has its own catalog visibility setting in Portal.
Check the result
- Open the catalog in a private browser window.
- Try each filter and the sort order.
- Open a trip and submit a test join request to see the form and agreements.
- Repeat on a phone.
Travelers see your agreements and form fields, and visitors can browse Published trips in the catalog.