
Browse the operator manual
Start here
Get started with Operations CenterTake a trip from Draft to departureUse Dashboard and RadarVideo guidesOrganization setup
Set up your organizationSet company identity and portal brandingSet editor, schedule, and writing defaultsConfigure traveler forms, legal content, and the public catalogConfigure payment providers and payment documentsConfigure automatic emailSet monitoring and notification thresholdsCreate and build
Create a tripImport a trip with AIComplete trip details and residencesBuild the itineraryAdd flights and transfersAssign field staff and partnersPublish and sell
Configure and publish the traveler portalDesign the traveler pageGive and remove portal accessConfigure pricing and collect paymentsReview and approve join requestsManage travelers and roomingWork with sales and FinancePrepare and operate
Prepare a trip for departureManage files and messagesMonitor live operationsSaved content and contacts
Reuse saved trip contentMaintain field staff, partners, and suppliersReference
Trip status referenceManage the tour listFix common problemsPublish and sell
Review and approve join requests
Check the requester, travelers, room choice, price, and payment, then approve or reject the request.
Before you begin
- Join requests turned on for the trip
- Room types and prices entered
You will learn to
- Read request states
- Correct details before approval
- Approve or reject a request
Reviewed September 2026
Open a trip → Travelers → Join Requests
Request states
| State | Meaning | Your action |
|---|---|---|
| Payment pending | The traveler has not completed checkout | Wait, or check the sale in Finance |
| Pending | Ready for your decision | Review and approve or reject |
| Approved | Travelers added to the roster | Send invitations and assign rooms |
| Rejected | You declined the request | Follow up with the requester |
| Withdrawn | The requester cancelled | Check the related sale and links |
New requests appear on the Dashboard, in notifications, and in the trip’s Join Requests tab.
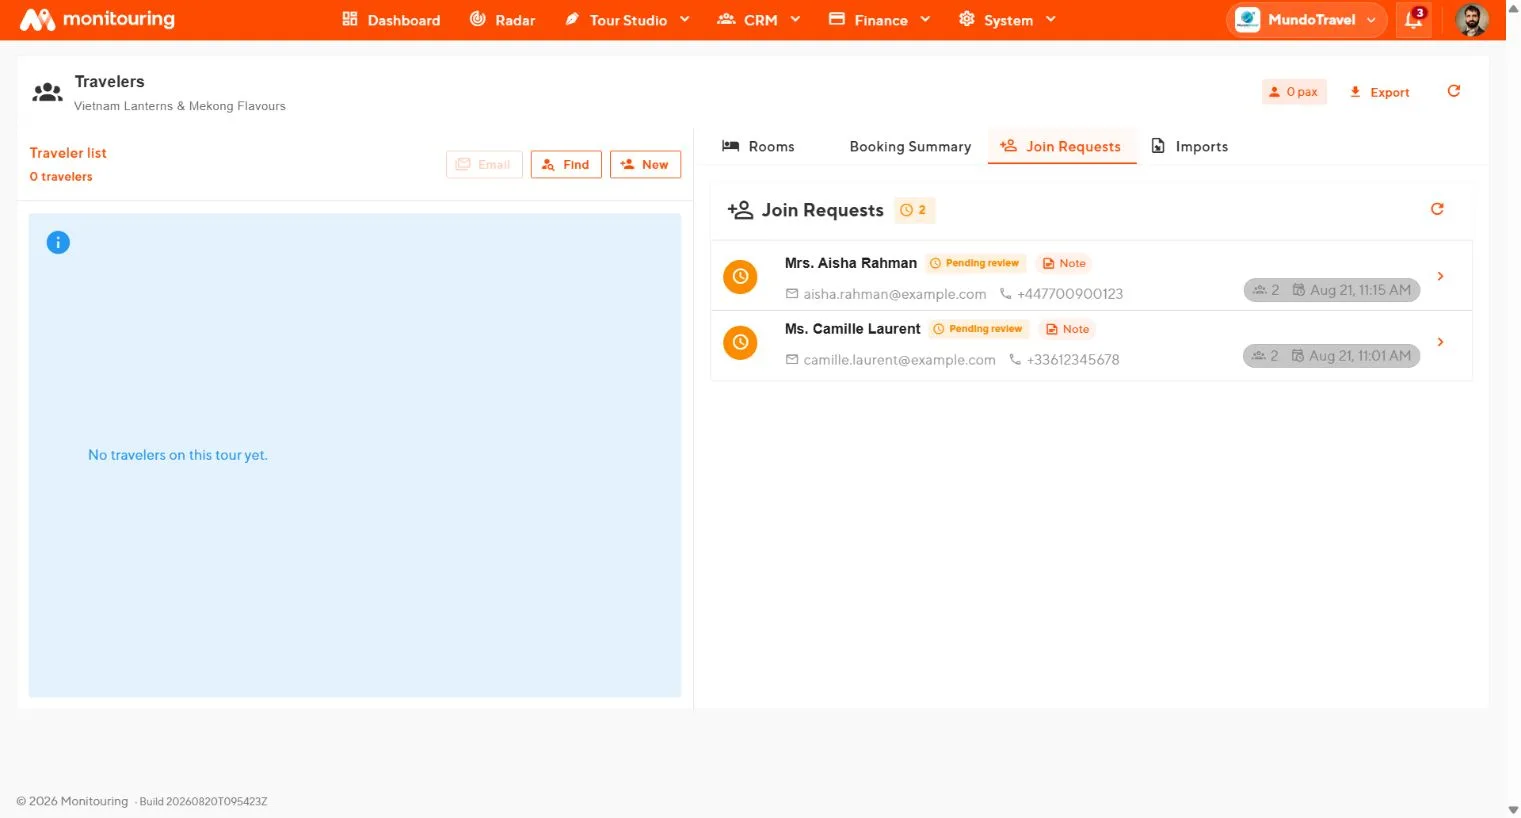
Review a request
- Open the request.
- Check the requester’s name, email, phone, and notes.
- Expand each traveler and check their name, contact details, and requested room.
- Check the room choice against the residence’s room types.
- Check upgrades, extras, accepted agreements, and the price summary.
- Check the payment state and the related sale.
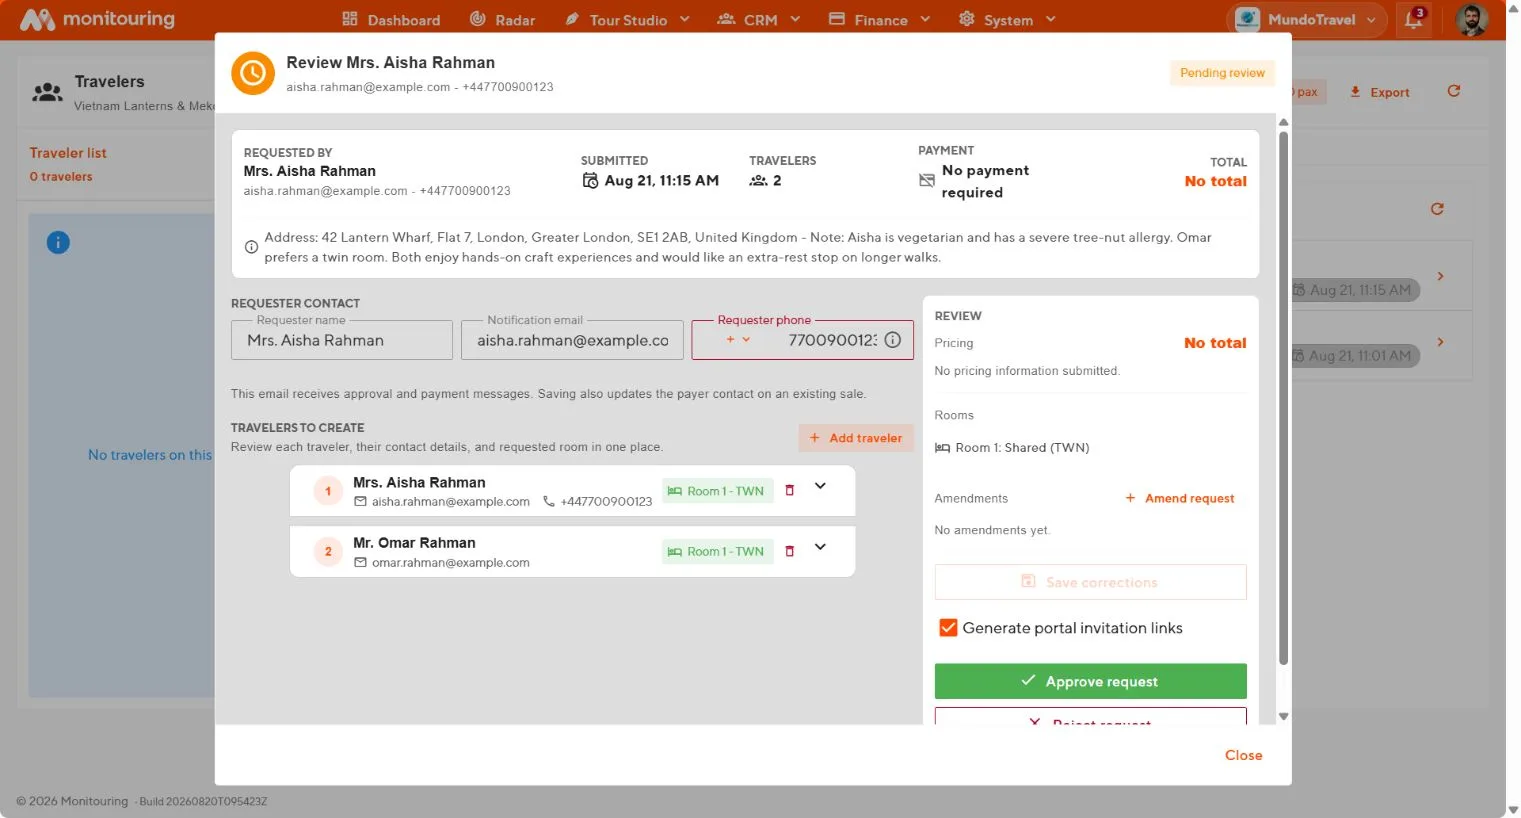
Correct details
- Edit the requester’s contact fields to fix a typo. The change also updates the payer on the related sale.
- Select Amend request when the agreed price or items differ from the submission. Enter the change and check the new balance.
Approve
- Keep Generate portal invitation links selected if travelers should receive private links.
- Select Approve request.
- Read the confirmation, including how many travelers were added and whether an email was sent.
- Copy the invitation links if you send them yourself.
- Open the roster and Rooms tab and check the new travelers.
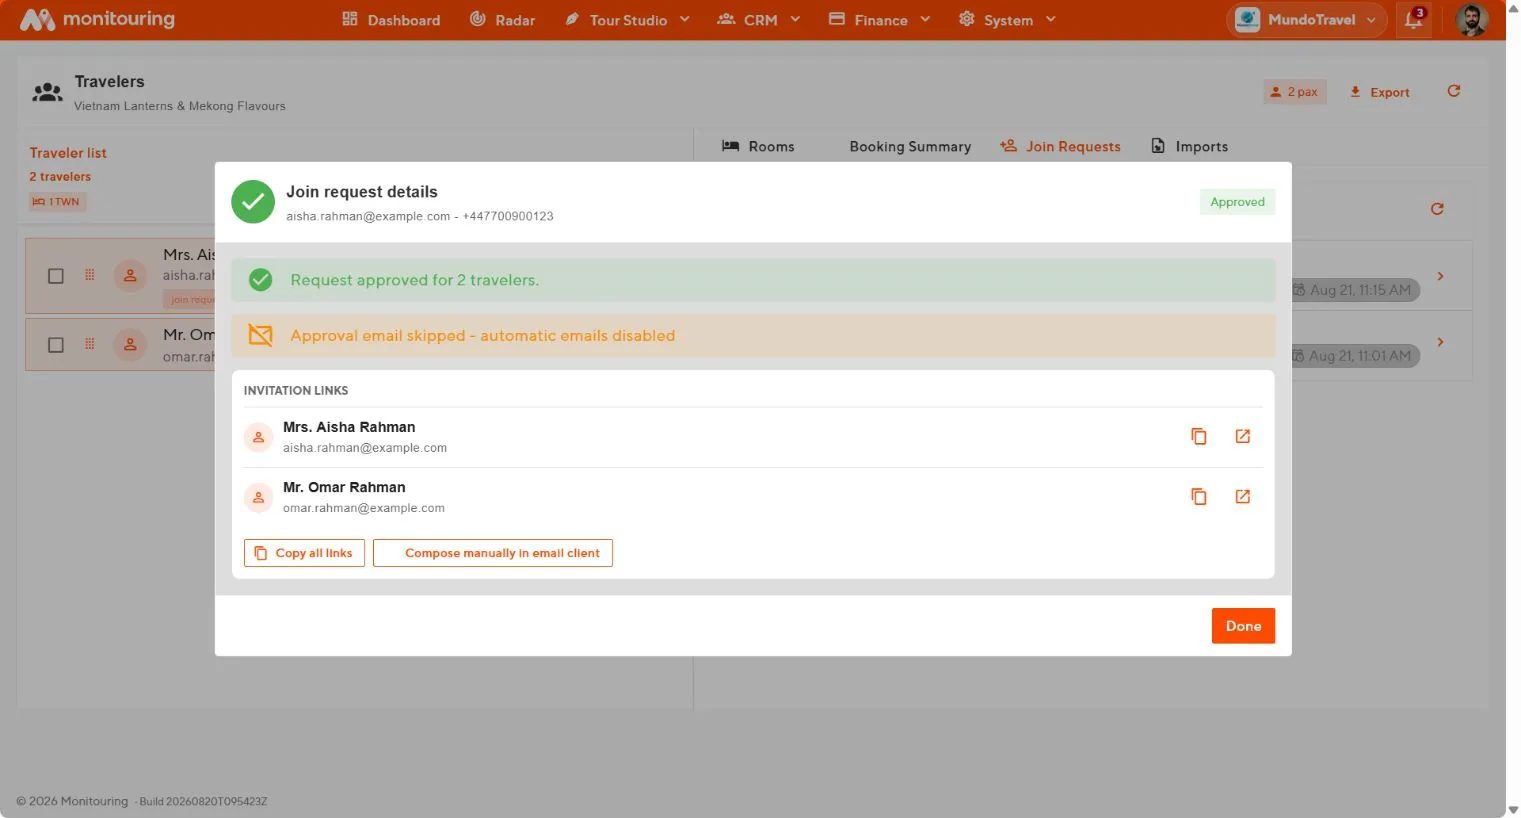
Approval and payment are separate. A traveler can be approved with a balance still due. Check the sale in Finance.
Reject or handle a withdrawal
Select reject and record the reason. Then open the related sale in Finance → Sales and cancel any active payment link. For a withdrawn request, do the same and check the roster and private links.
The request has a final state, the roster and rooms match the decision, and invitations reached the travelers.