
Browse the operator manual
Start here
Get started with Operations CenterTake a trip from Draft to departureUse Dashboard and RadarVideo guidesOrganization setup
Set up your organizationSet company identity and portal brandingSet editor, schedule, and writing defaultsConfigure traveler forms, legal content, and the public catalogConfigure payment providers and payment documentsConfigure automatic emailSet monitoring and notification thresholdsCreate and build
Create a tripImport a trip with AIComplete trip details and residencesBuild the itineraryAdd flights and transfersAssign field staff and partnersPublish and sell
Configure and publish the traveler portalDesign the traveler pageGive and remove portal accessConfigure pricing and collect paymentsReview and approve join requestsManage travelers and roomingWork with sales and FinancePrepare and operate
Prepare a trip for departureManage files and messagesMonitor live operationsSaved content and contacts
Reuse saved trip contentMaintain field staff, partners, and suppliersReference
Trip status referenceManage the tour listFix common problemsCreate and build
Import a trip with AI
Turn a supplier itinerary, PDF, image, or pasted program into a Draft you have checked.
Before you begin
- A readable supplier program or itinerary
- The trip dates, country, and time zone
You will learn to
- Prepare source material the importer can read
- Review and correct extracted details
Reviewed September 2026
Prepare the source
- Use the clearest, most complete version of the program. Avoid mixing versions that disagree.
- Check that dates, place names, flight numbers, and hotel nights are readable.
- Keep the source open so you can compare it with the result.
Limits: up to 12 files, images up to 10 MB each, PDFs up to 20 MB each, and about 40,000 characters of text.
Upload and extract
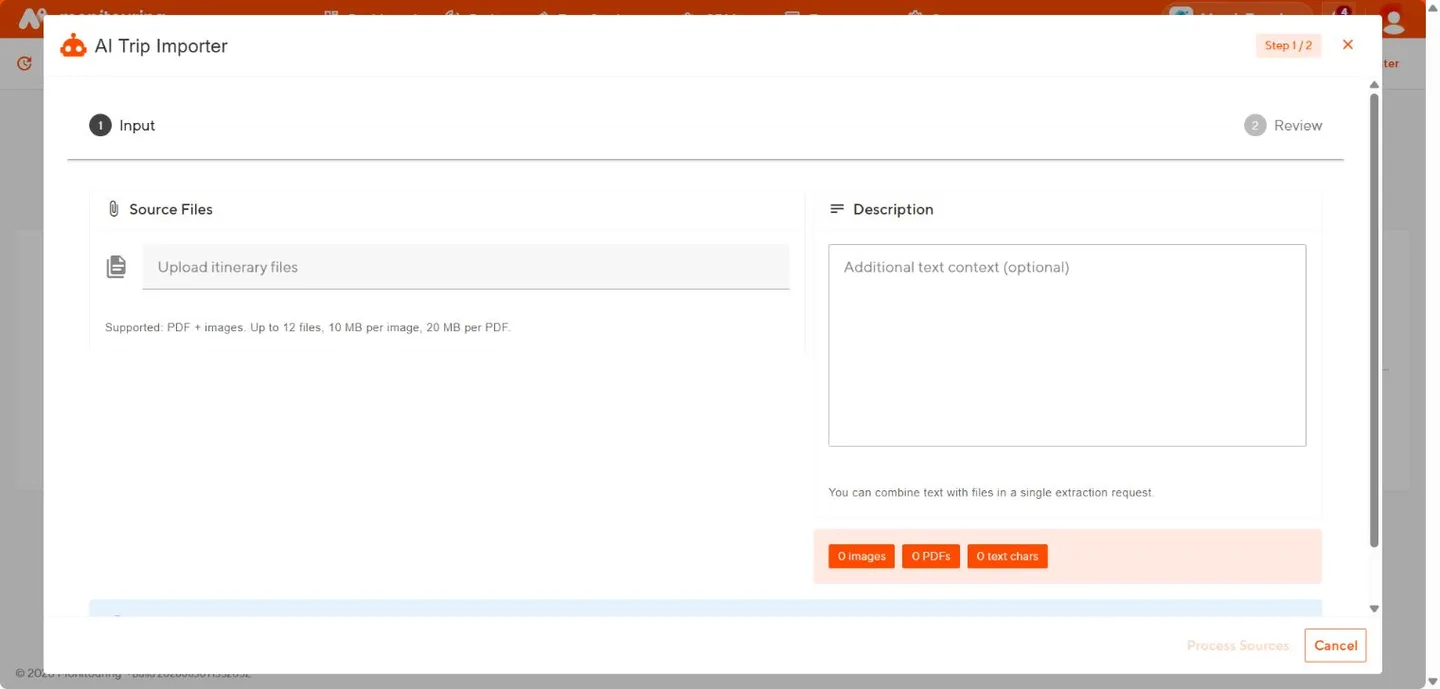
- Add PDFs or images, or paste the itinerary text.
- Start extraction and keep the page open until it finishes.
- Read any file warnings and replace unreadable scans.
- Continue to the review step.
Review each tab
| Tab | Check |
|---|---|
| Trip details | Name, code, start date, length, country, time zone, description |
| Flights | Airline, flight number, airports, local dates and times, time zones. Use Day 0 for an inbound flight that departs the day before Day 1 |
| Residences | Property, location, first night, number of nights, check-in and check-out times, room types. Merge duplicates of the same stay |
| Activities | Each activity on the correct day and location. Remove duplicate transfers and meals |
Remove anything you are unsure about. You can add it in the editor later.
Create the Draft
- Select create.
- Open Edit → Tour Details and compare the dates and time zone with the source.
- Open Residences and Segments and read the full sequence from Day 0 to the last day.
- Select Save Tour.
Imported details come from the document, not from the supplier or airline. Confirm availability, schedules, and prices before publishing.
If the result is poor
Return to the source. Use a cleaner PDF, a higher-resolution image, or a shorter section of text, then import again. For long mixed-language programs, import one section at a time and combine the results in the editor.
The Draft has the correct date range, one entry per stay, and a day sequence that matches the source.