
Browse the operator manual
Start here
Get started with Operations CenterTake a trip from Draft to departureUse Dashboard and RadarVideo guidesOrganization setup
Set up your organizationSet company identity and portal brandingSet editor, schedule, and writing defaultsConfigure traveler forms, legal content, and the public catalogConfigure payment providers and payment documentsConfigure automatic emailSet monitoring and notification thresholdsCreate and build
Create a tripImport a trip with AIComplete trip details and residencesBuild the itineraryAdd flights and transfersAssign field staff and partnersPublish and sell
Configure and publish the traveler portalDesign the traveler pageGive and remove portal accessConfigure pricing and collect paymentsReview and approve join requestsManage travelers and roomingWork with sales and FinancePrepare and operate
Prepare a trip for departureManage files and messagesMonitor live operationsSaved content and contacts
Reuse saved trip contentMaintain field staff, partners, and suppliersReference
Trip status referenceManage the tour listFix common problemsPrepare and operate
Manage files and messages
Upload and share files with the right audience, use trip message rooms and notes, and allocate inbound email.
Before you begin
- A trip with travelers, staff, or partners
You will learn to
- Upload and share files
- Use message rooms and internal notes
- Allocate unmatched email
Reviewed September 2026
Upload a file
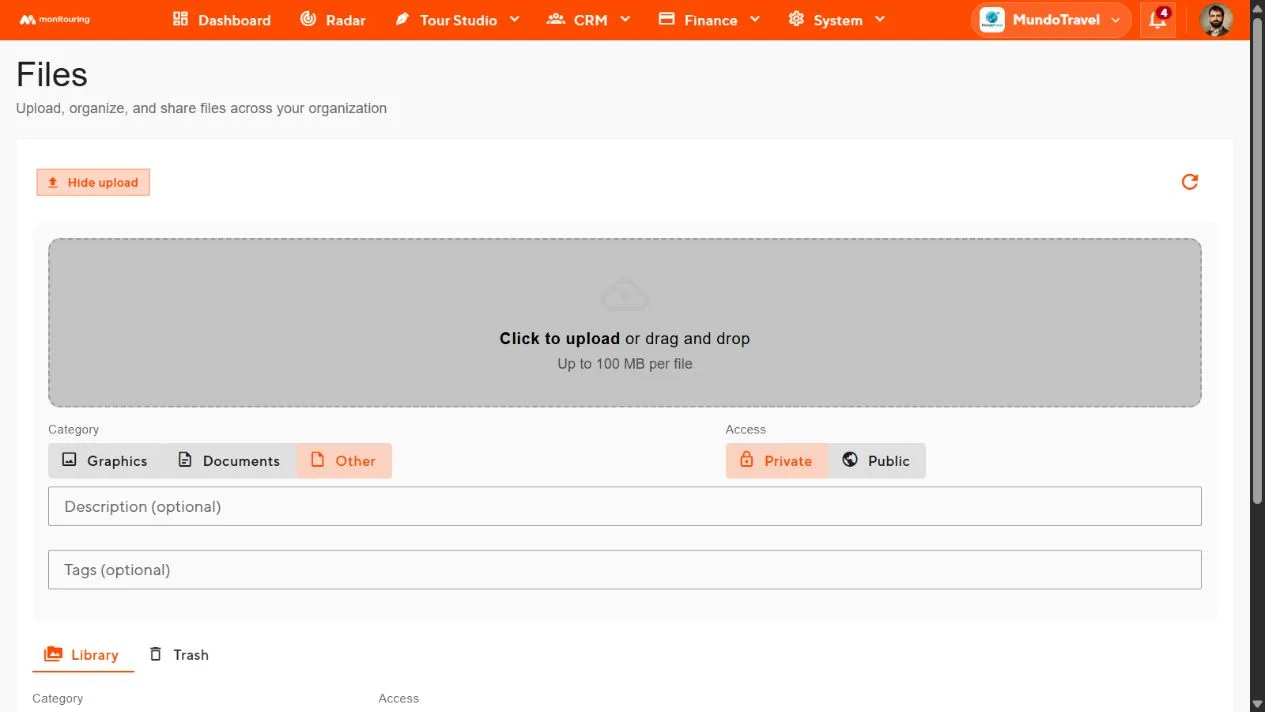
- Open the trip’s Files workspace or System → File Library.
- Upload the file and enter a title, category, description, and tags.
- Set access to Public or Private.
- Link the file to the trip, a traveler, a segment, or a supplier.
Public files can appear on traveler pages. Keep traveler documents, contracts, and internal material Private.
Share a file with travelers
- In Travelers, select the recipients.
- Select Email and choose the files to include.
- Review each message and send.
Each traveler receives a personalized email with a private link to the trip.
Removing a file from a trip keeps it in the File Library. Use Trash and Restore in the library to remove or recover files.
Message rooms
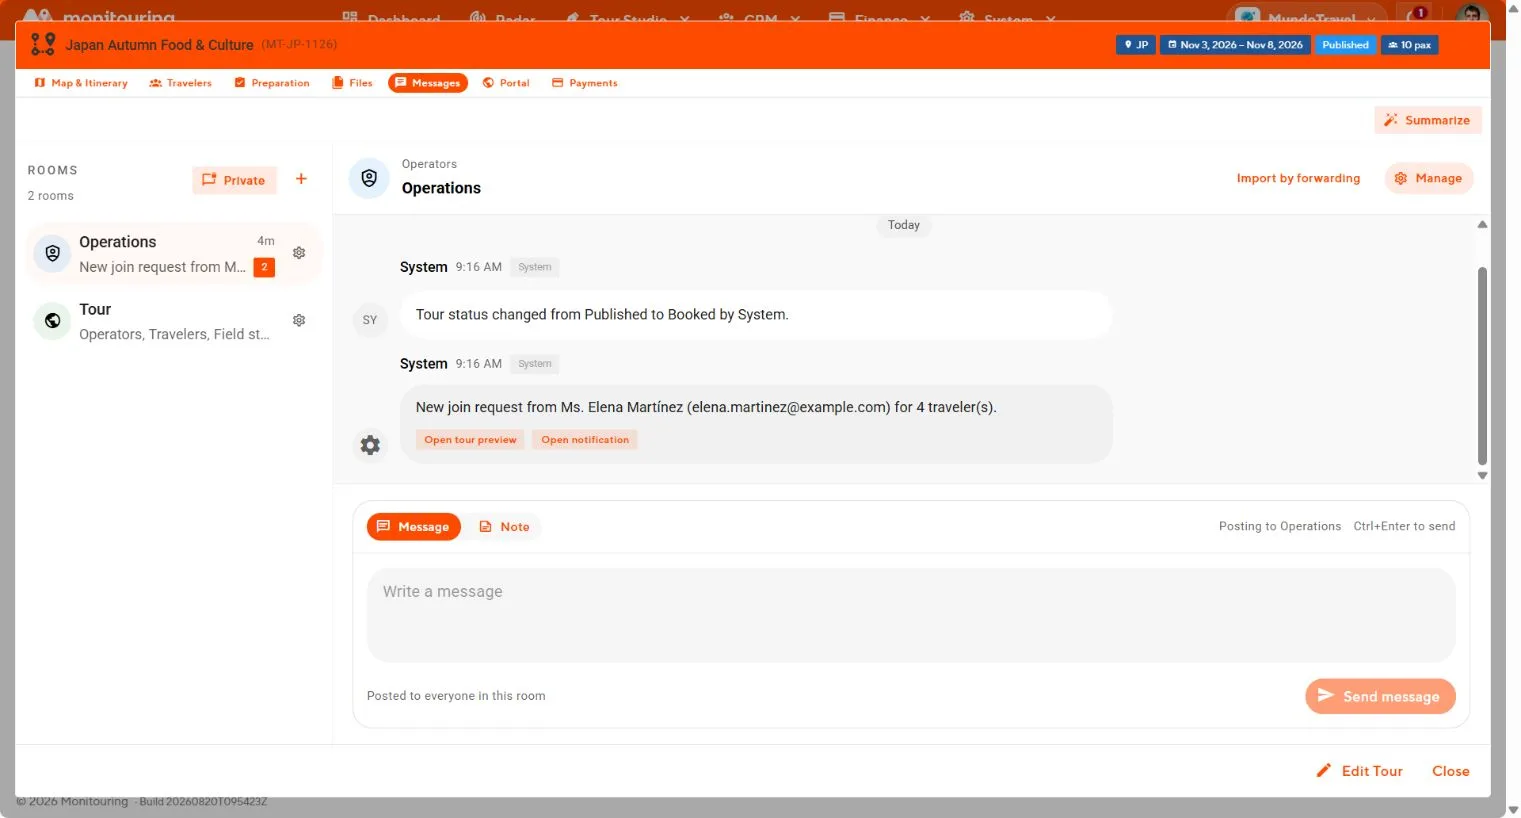
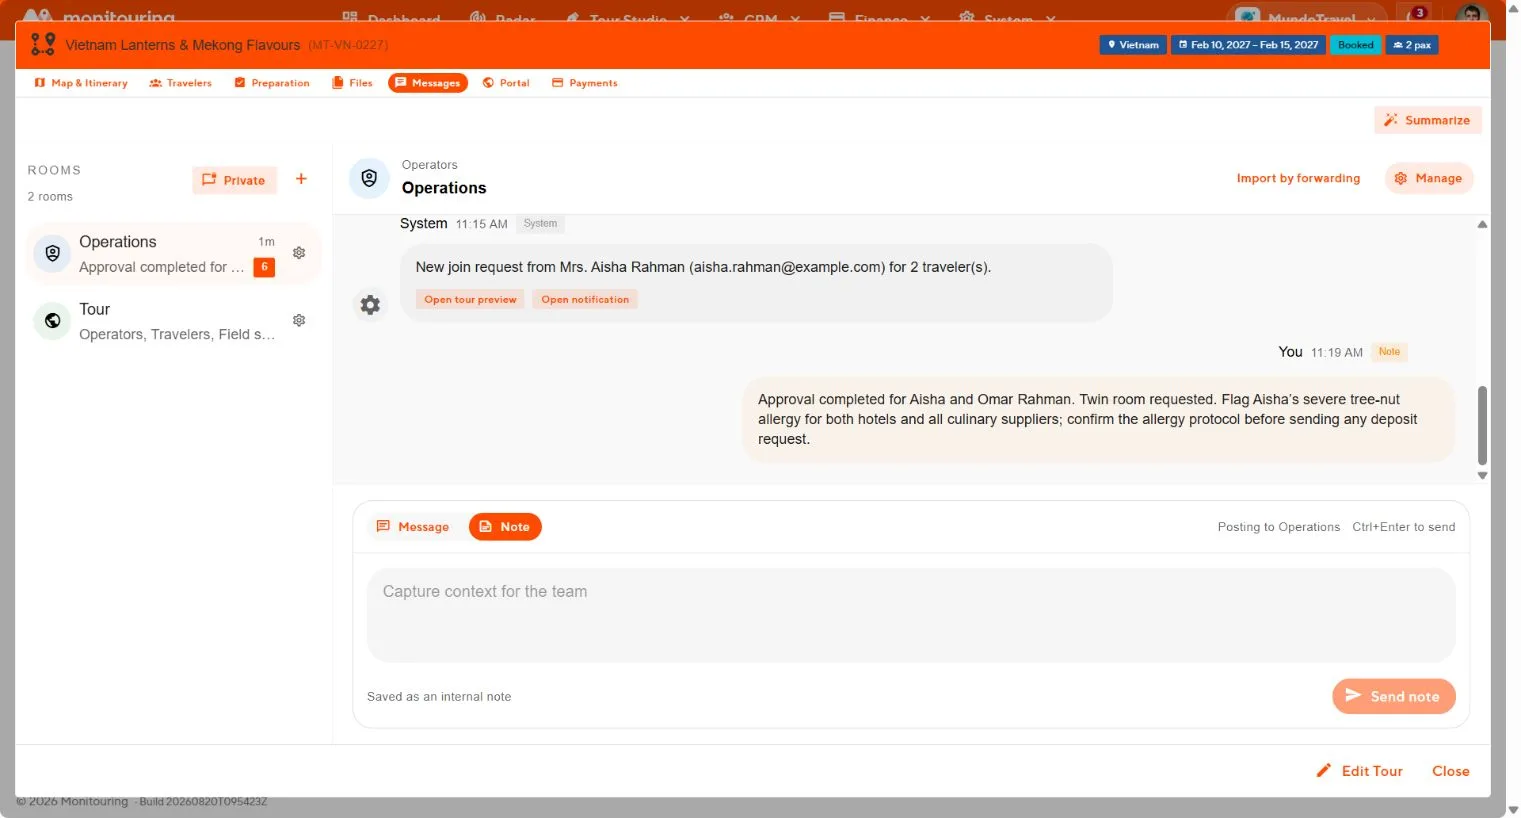
The trip’s Messages workspace has an Operations room for your team and a Tour room for the wider trip. Create private rooms for smaller groups.
- Select the room and open Manage to check who is in it.
- Choose Message to write to the room, or Note to record internal context that is only visible to your team.
- Write enough for the next operator to understand the decision and the next step.
Summarize a room
Select the summary action, choose the rooms and content to include, and generate. Read the summary against the messages before you copy it into a handover.
Inbound email
Email forwarded to Operations Center that matches a trip appears in that trip’s Operations room. Use Import by forwarding in the room’s Manage panel to see the forwarding address.
Email that cannot be matched appears in System → Unallocated Emails. Open the item, read the sender and content, and allocate it to the right trip and room, or discard it.
Check a sent email
System → Mail History shows every email with its status: Pending review, Queued, Processing, Sent, Failed, or Cancelled. Open a message to see delivery details such as bounces.
Files are shared with the right audience, and every conversation and note sits in the right trip room.