
Browse the operator manual
Start here
Get started with Operations CenterTake a trip from Draft to departureUse Dashboard and RadarVideo guidesOrganization setup
Set up your organizationSet company identity and portal brandingSet editor, schedule, and writing defaultsConfigure traveler forms, legal content, and the public catalogConfigure payment providers and payment documentsConfigure automatic emailSet monitoring and notification thresholdsCreate and build
Create a tripImport a trip with AIComplete trip details and residencesBuild the itineraryAdd flights and transfersAssign field staff and partnersPublish and sell
Configure and publish the traveler portalDesign the traveler pageGive and remove portal accessConfigure pricing and collect paymentsReview and approve join requestsManage travelers and roomingWork with sales and FinancePrepare and operate
Prepare a trip for departureManage files and messagesMonitor live operationsSaved content and contacts
Reuse saved trip contentMaintain field staff, partners, and suppliersReference
Trip status referenceManage the tour listFix common problemsOrganization setup
Configure automatic email
Choose which emails send automatically, in which languages, with what branding, and how reminders are timed.
Before you begin
- Organization administrator access
- Approved email text and reminder policy
You will learn to
- Turn on automatic email with review
- Set languages, reminder timing, branding, and custom variables
- Check what happened to a message
Reviewed September 2026
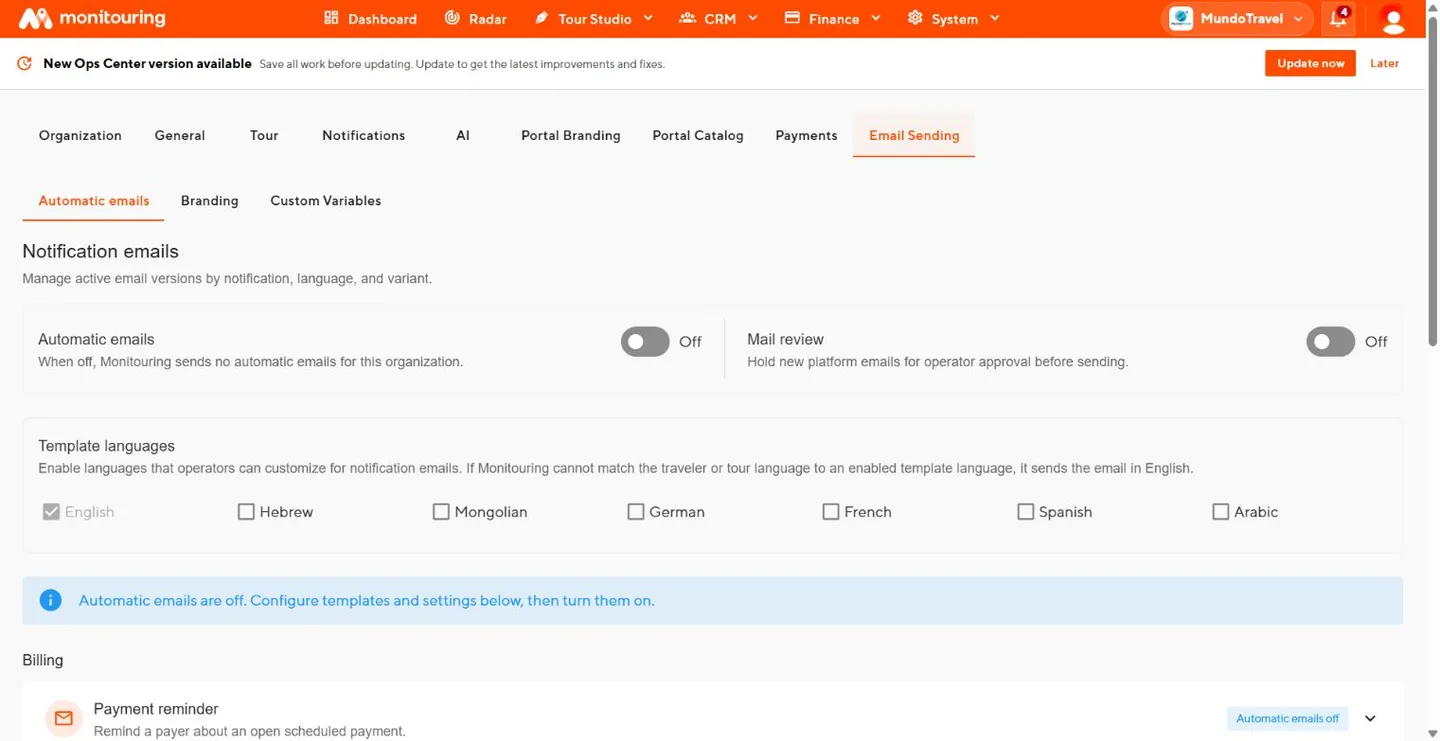
Automatic emails
Open Automatic emails.
| Setting | Effect |
|---|---|
| Automatic emails | Master switch for platform-generated email |
| Mail review | Holds each new email for approval in Mail History → Review |
| Template languages | Languages available for automatic messages |
| Message type and variant switches | Which situations send an email |
Payment reminder timing
Set the reminder schedule:
- days before the due date;
- on the due date;
- days after the due date for the first overdue reminder;
- the repeat interval and maximum number of overdue reminders.
Branding
Open Branding.
- Turn on custom email branding, or keep portal branding.
- Enter the logo URL and choose the primary and accent colors.
- Preview desktop and mobile layouts in each language direction you use.
Custom Variables
Custom variables insert organization details into email text. Each variable has a Key, Label, Type, Value, and optional per-language overrides. Preview every message that uses a new variable.
Turn on sending
- Keep Automatic emails off while you edit content.
- Enable the template languages and complete each message type.
- Set reminder timing, branding, and variables.
- Turn on Mail review.
- Turn on Automatic emails.
- Approve held messages in Mail History → Review until you are confident in the content, then turn off Mail review if you wish.
Check a message
Open System → Mail History and find the message by recipient, trip, or time.
| Status | Meaning | Action |
|---|---|---|
| Pending review | Waiting for approval | Approve or cancel it in Review |
| Queued or Processing | Being sent | Wait |
| Sent | Handed to the mail service | Open the message for delivery details |
| Failed | Sending failed | Read the error, fix the cause, and send again |
| Cancelled | Cancelled by an operator | Send a replacement if needed |
The message details show delivery events such as bounces and spam complaints. If an address bounced, confirm the correct address with the recipient before sending again.
Automatic emails send with your content, languages, timing, and branding, and you can see the status of every message.