
Browse the operator manual
Start here
Get started with Operations CenterTake a trip from Draft to departureUse Dashboard and RadarVideo guidesOrganization setup
Set up your organizationSet company identity and portal brandingSet editor, schedule, and writing defaultsConfigure traveler forms, legal content, and the public catalogConfigure payment providers and payment documentsConfigure automatic emailSet monitoring and notification thresholdsCreate and build
Create a tripImport a trip with AIComplete trip details and residencesBuild the itineraryAdd flights and transfersAssign field staff and partnersPublish and sell
Configure and publish the traveler portalDesign the traveler pageGive and remove portal accessConfigure pricing and collect paymentsReview and approve join requestsManage travelers and roomingWork with sales and FinancePrepare and operate
Prepare a trip for departureManage files and messagesMonitor live operationsSaved content and contacts
Reuse saved trip contentMaintain field staff, partners, and suppliersReference
Trip status referenceManage the tour listFix common problemsStart here
Use Dashboard and Radar
Start your day from the Dashboard, check trips on Radar, and work through notifications.
Before you begin
- At least one trip in your organization
You will learn to
- Find trips that are active, starting soon, or waiting on work
- Handle notifications from first view to resolved
Reviewed September 2026
Dashboard
Read the Dashboard
The Dashboard is your start-of-day view.
- Check the counters: Active Trips, Starting Soon, Pending Emails, New Join Requests, and Payments Complete.
- Review Trip Health and Notifications.
- Use the trip list to search by name or code.
- Select a trip, request, or alert to open it in its workspace.
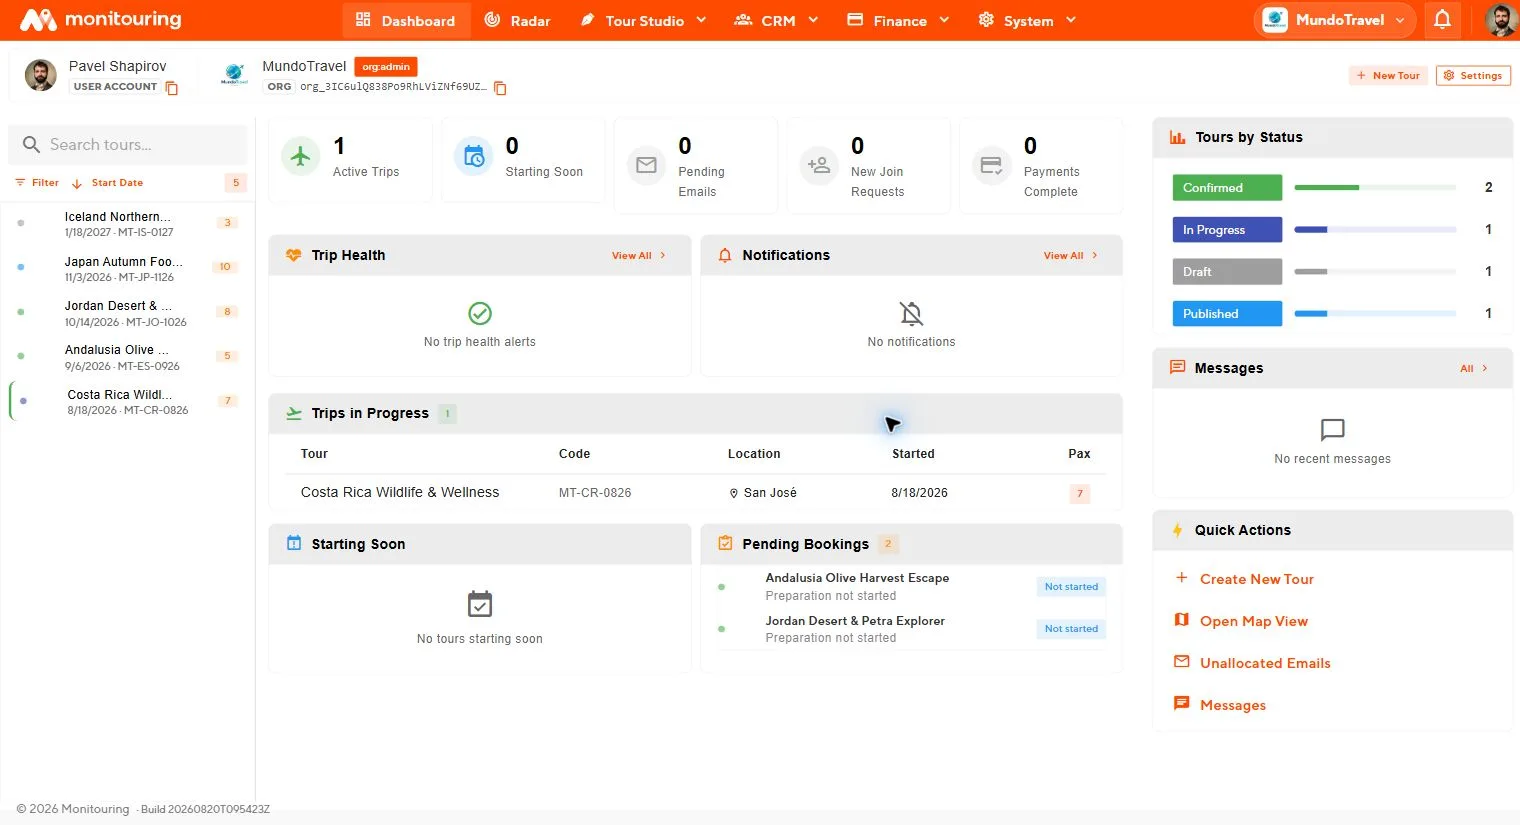
| Dashboard area | Next action |
|---|---|
| Active Trips | Open Radar or the trip workspace |
| Starting Soon | Open Preparation and refresh the flow |
| Pending Emails | Open System → Mail History → Review |
| New Join Requests | Open Travelers → Join Requests |
| Payments Complete | Open Finance → Sales |
| Trip Health | Open the alert and respond |
| Pending Bookings | Open Preparation → Bookings |
If your account belongs to more than one organization, check the organization name at the top right before you start.
Use Radar
Radar shows the trips operating on a chosen day on a map and timeline.
- Select a date or trip.
- Review the day’s segments and locations.
- Check who is assigned to each day and segment.
- When location monitoring is on, view the latest staff positions.
- Select a segment or alert to open its details.
Work through notifications
Select the bell in the top bar to open Organization Notifications. Search by trip or text and filter by status, kind, severity, or source.
| Status | Meaning |
|---|---|
| Unread | Nobody has reviewed the item yet |
| Acknowledged | Someone owns the response |
| Resolved | The response is complete |
| Dismissed | The item needed no action |
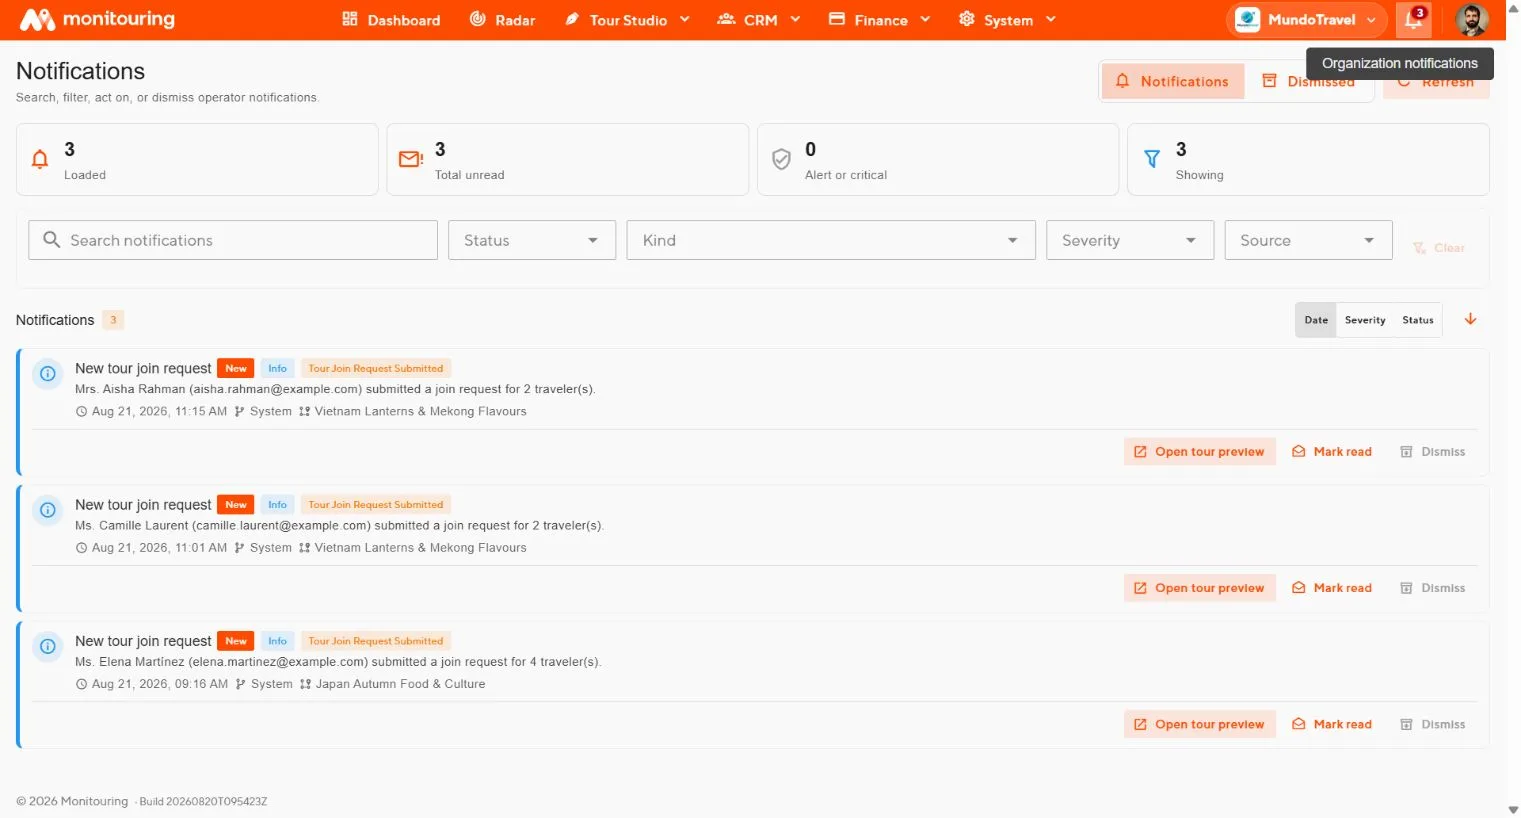
- Open the notification and read the trip, segment, severity, and time.
- Select Acknowledge when you take ownership.
- Complete the response in the trip workspace.
- Select Resolve. Dismiss only items that need no action.
To restore a dismissed item, open the Dismissed view, find the item, and select Restore.
Every item on the Dashboard and in Notifications has an owner or is resolved.