
Browse the operator manual
Start here
Get started with Operations CenterTake a trip from Draft to departureUse Dashboard and RadarVideo guidesOrganization setup
Set up your organizationSet company identity and portal brandingSet editor, schedule, and writing defaultsConfigure traveler forms, legal content, and the public catalogConfigure payment providers and payment documentsConfigure automatic emailSet monitoring and notification thresholdsCreate and build
Create a tripImport a trip with AIComplete trip details and residencesBuild the itineraryAdd flights and transfersAssign field staff and partnersPublish and sell
Configure and publish the traveler portalDesign the traveler pageGive and remove portal accessConfigure pricing and collect paymentsReview and approve join requestsManage travelers and roomingWork with sales and FinancePrepare and operate
Prepare a trip for departureManage files and messagesMonitor live operationsSaved content and contacts
Reuse saved trip contentMaintain field staff, partners, and suppliersReference
Trip status referenceManage the tour listFix common problemsCreate and build
Create a trip
Choose a creation method and create a Draft with the correct dates, time zone, and first services.
Before you begin
- Trip name, start date, duration, country, and time zone
You will learn to
- Choose the right creation method
- Complete Quick Start
Reviewed September 2026
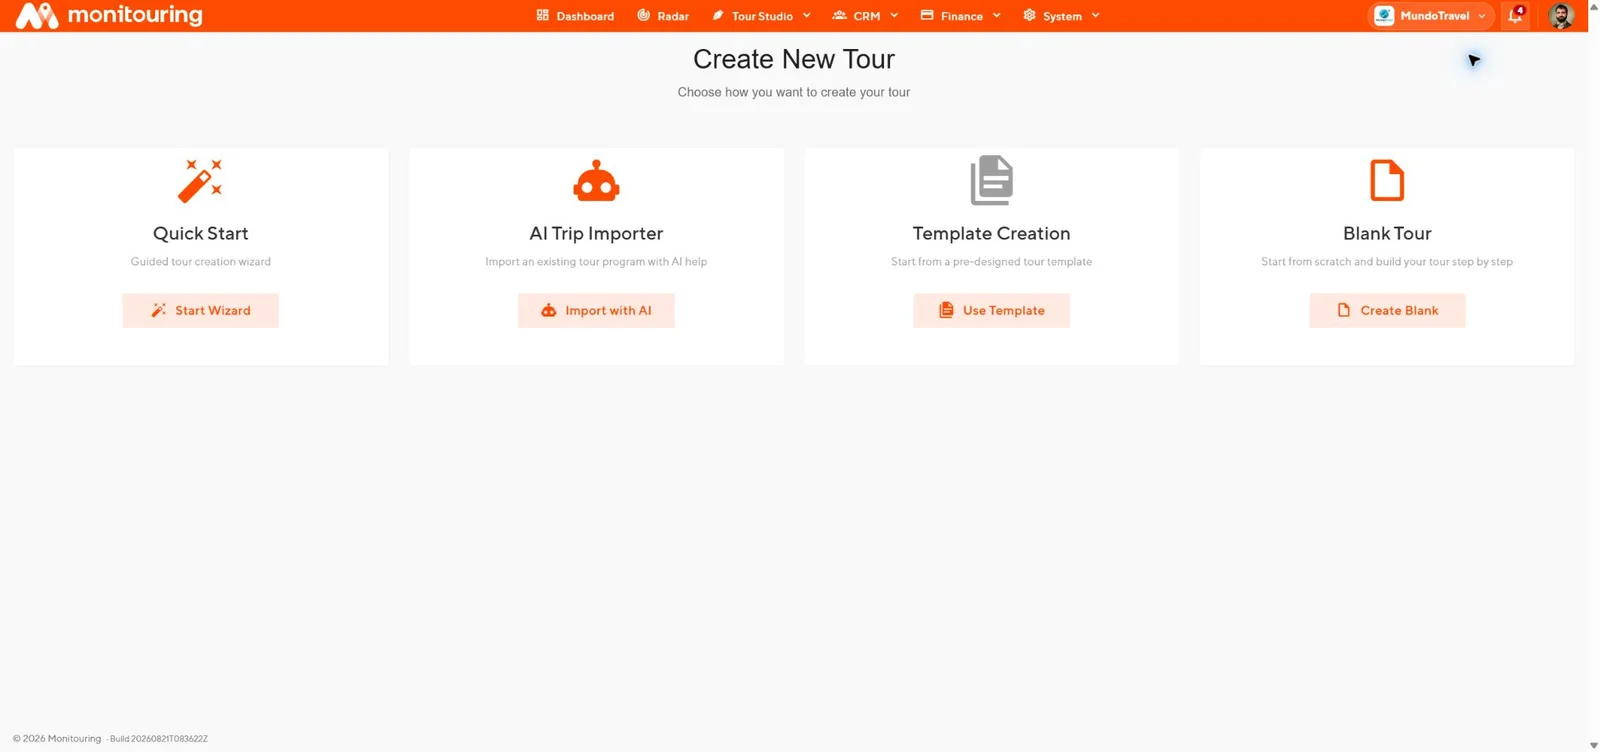
Choose a method
| Method | Best for |
|---|---|
| Quick Start | A guided setup of details, first residence, flights, and generated segments |
| Blank Tour | Building everything yourself in the editor |
| Template Creation | Repeating a program you have saved as a Tour Template |
| AI Trip Importer | A supplier program, PDF, image, or pasted itinerary |
Complete Quick Start
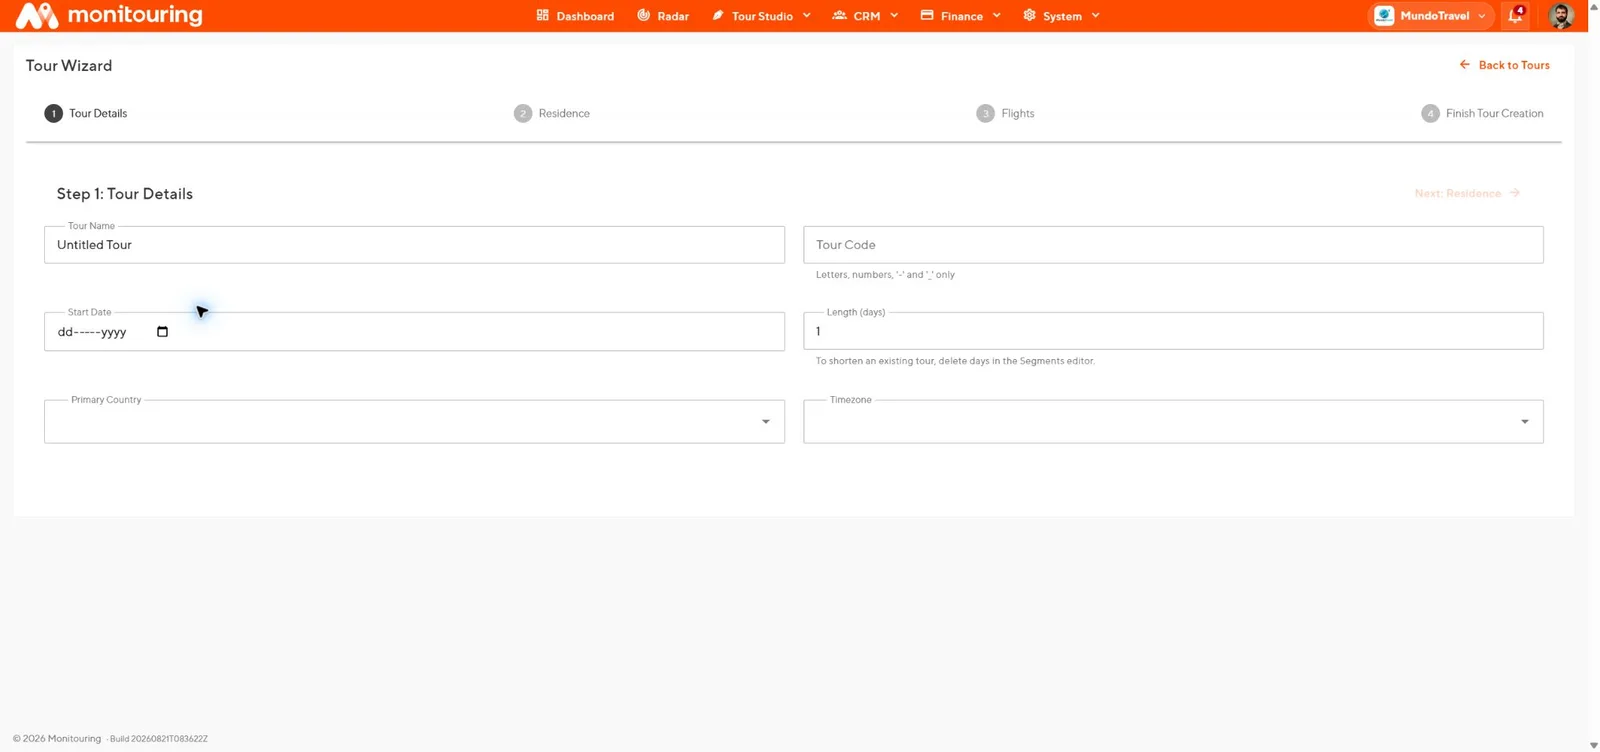
1. Trip details
Enter the name, a unique tour code, start date, length in days, primary country, and the trip time zone. Flights and segments can still use their own local time zones.
2. First residence
Add the accommodation, its first night, and the number of nights. Add at least one room type if the trip uses rooming or room upgrades. Select the save option to keep the residence for future trips.
3. Flights
Add the inbound and return flights if you know them. Enter the flight code and select Verify to fill in the schedule, then check the airports, local times, and dates.
4. Finish
Review the summary and choose the segments to generate, such as breakfasts, airport transfers, and hotel check-in. Select finish to open the Draft in the editor, then check every generated segment.
Use a template
Select Template Creation → Use Template and choose a Tour Template. The new Draft copies the template’s structure, text, photos, locations, residences, flights, and staff. Set the start date, then review each day.
Use AI import
Select AI Trip Importer → Import with AI, add the source files or text, and review the extracted details before creating the Draft. See Import a trip with AI.
A new Draft exists with a unique code, the correct dates and time zone, and its first residence and flights.