
Browse the operator manual
Start here
Get started with Operations CenterTake a trip from Draft to departureUse Dashboard and RadarVideo guidesOrganization setup
Set up your organizationSet company identity and portal brandingSet editor, schedule, and writing defaultsConfigure traveler forms, legal content, and the public catalogConfigure payment providers and payment documentsConfigure automatic emailSet monitoring and notification thresholdsCreate and build
Create a tripImport a trip with AIComplete trip details and residencesBuild the itineraryAdd flights and transfersAssign field staff and partnersPublish and sell
Configure and publish the traveler portalDesign the traveler pageGive and remove portal accessConfigure pricing and collect paymentsReview and approve join requestsManage travelers and roomingWork with sales and FinancePrepare and operate
Prepare a trip for departureManage files and messagesMonitor live operationsSaved content and contacts
Reuse saved trip contentMaintain field staff, partners, and suppliersReference
Trip status referenceManage the tour listFix common problemsCreate and build
Build the itinerary
Add days and timed segments, use generators and templates, and check the schedule in order.
Before you begin
- Trip dates and time zone saved
- Residences added
You will learn to
- Add, move, and delete days
- Add each segment type
- Use generators and templates
Reviewed September 2026
Each day has a title, description, photos, and day staff. Each segment inside a day has a time, duration, location, and type.
Add, move, and delete days
- Select Add day here between two days.
- Add the day title, description, photos, and day staff.
- Use Move day up or Move day down to reorder.
- Select Save Tour and read the days around the change.
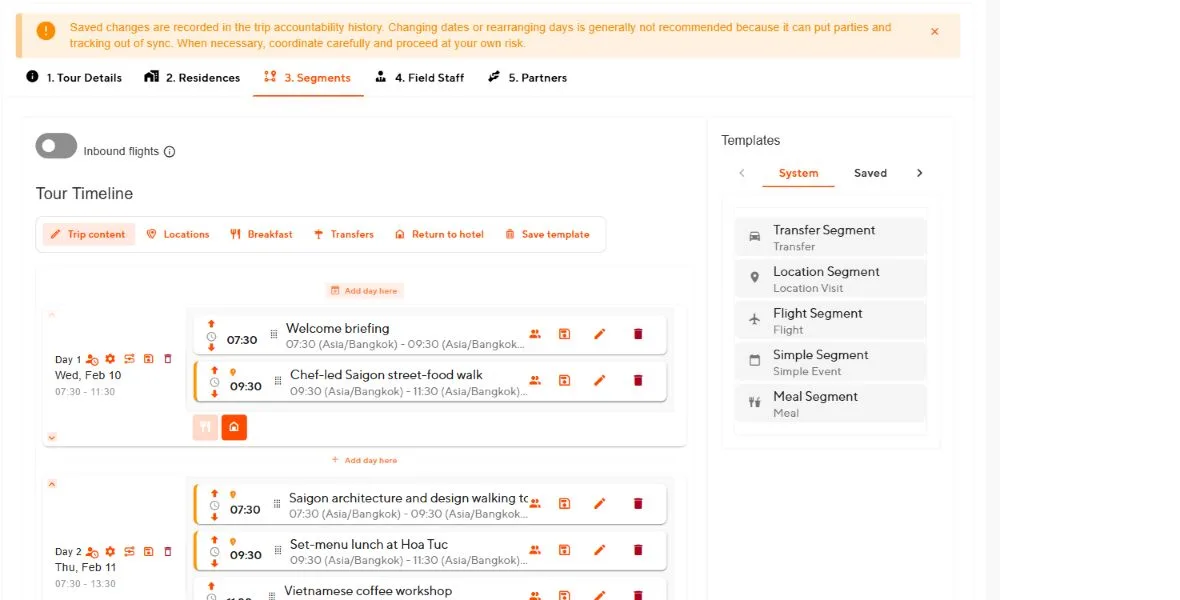
Deleting a day removes its text, photos, staff assignments, and every segment on it, and can shorten a residence stay. Check Residences, Payments, Portal, and Preparation afterwards.
Add a segment
| Segment | Use for | Enter |
|---|---|---|
| Flight | A scheduled flight | Flight number, airports, local date and time, time zones |
| Transfer | Movement between two places | From, to, travel mode, start time, duration |
| Location Visit | A visit, hotel check-in, or check-out | Place, local time, duration, booking needed |
| Meal | Breakfast, lunch, dinner, or snack | Meal type, included or not, place, time |
| Simple Event | Any other activity | Name, description, time, duration |
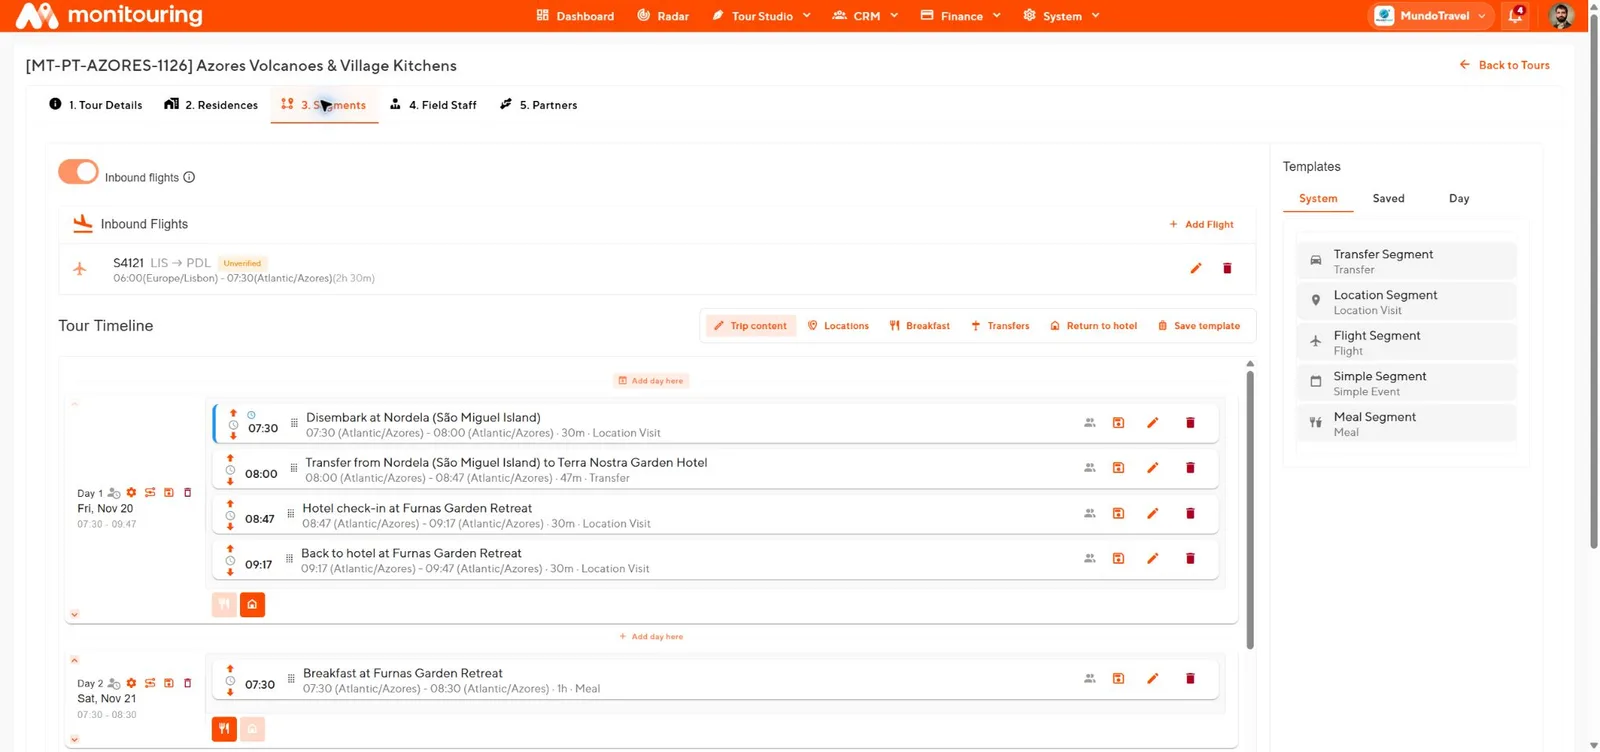
- Drag a segment type from System, Saved, or Day templates onto the day.
- Set the start time and duration.
- Enter the name, description, supplier, time zones, photos, and files.
- Turn on the fixed start time if the segment must not move when earlier segments change.
- Save and check the position and end time in the timeline.
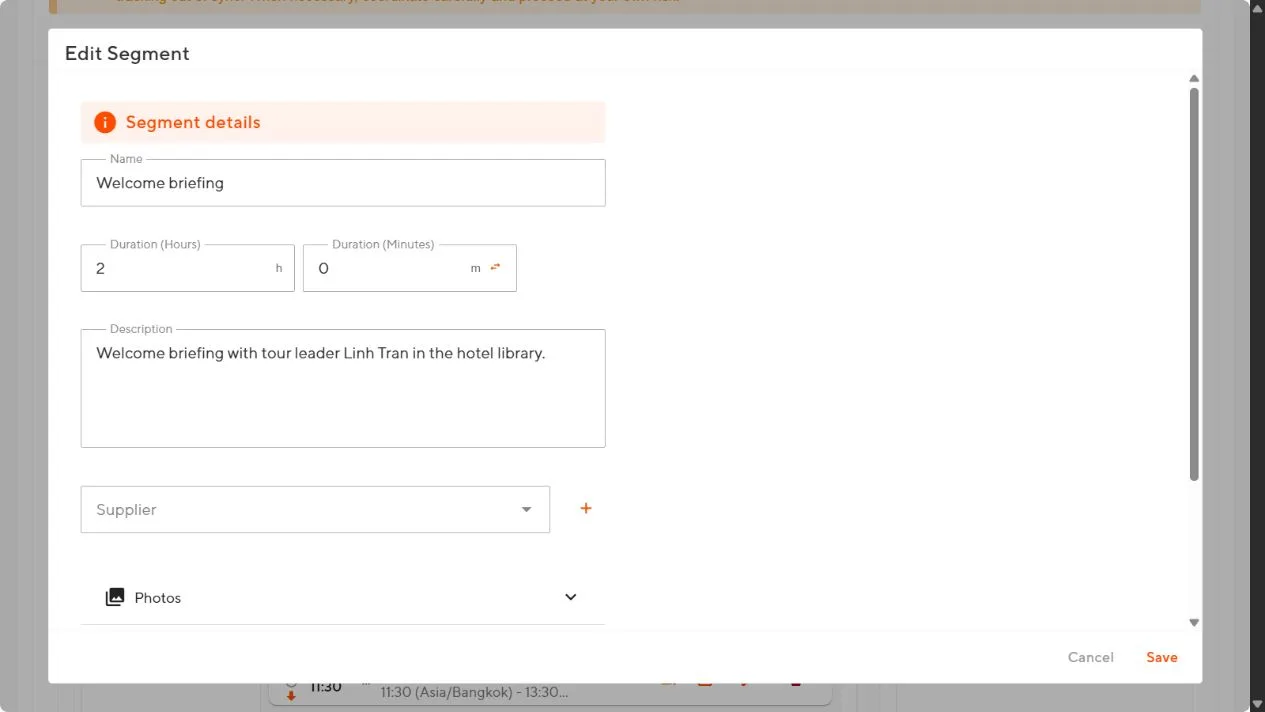
Generate segments
The toolbar above the timeline offers Breakfast, Transfers, Return to hotel, and other generators. Each one adds segments based on your residences and locations. Review each generated segment for time, place, and duplicates.
Save and reuse templates
- Select Save template on a segment to create a Segment Template.
- Select the save action on a day to create a Day Template.
- Select Save template in the toolbar to create a Tour Template from the whole trip.
Templates are copies. Editing a template later does not change trips that already used it.
Final check
Read the itinerary from top to bottom:
- every segment uses the correct local time zone;
- there is travel time between segments;
- check-in and check-out segments match residence nights;
- bookable segments appear in Preparation → Bookings;
- day and segment staff are assigned;
- traveler-facing text and photos are ready.
The timeline runs in a realistic local-time sequence with the correct places, durations, and staff.