
Browse the operator manual
Start here
Get started with Operations CenterTake a trip from Draft to departureUse Dashboard and RadarVideo guidesOrganization setup
Set up your organizationSet company identity and portal brandingSet editor, schedule, and writing defaultsConfigure traveler forms, legal content, and the public catalogConfigure payment providers and payment documentsConfigure automatic emailSet monitoring and notification thresholdsCreate and build
Create a tripImport a trip with AIComplete trip details and residencesBuild the itineraryAdd flights and transfersAssign field staff and partnersPublish and sell
Configure and publish the traveler portalDesign the traveler pageGive and remove portal accessConfigure pricing and collect paymentsReview and approve join requestsManage travelers and roomingWork with sales and FinancePrepare and operate
Prepare a trip for departureManage files and messagesMonitor live operationsSaved content and contacts
Reuse saved trip contentMaintain field staff, partners, and suppliersReference
Trip status referenceManage the tour listFix common problemsPublish and sell
Configure pricing and collect payments
Set the traveler price, upgrades, and extras, then choose the provider and payment schedule.
Before you begin
- A payment provider enabled in Settings
- Room types entered on each residence
You will learn to
- Build the traveler price
- Turn on portal payment collection
- Choose an amount model and schedule
Reviewed September 2026
Open a trip → Payments
Build the price
- Choose the trip currency.
- Enter the base price per person.
- Add a single supplement if single occupancy costs more.
- Add room upgrades and extras with clear traveler-facing names. Link an extra to a segment when it belongs to one.
- Check the total for the default room and for each upgrade.
The included room type is part of the base price. Do not list it as an upgrade.
Turn on payment collection
- Turn on Enable portal payment collection. Join requests must be on for the trip.
- Turn on Collect before confirmation to charge at booking, or leave it off to charge after the trip is confirmed.
- Under Payment provider, keep Organization default or choose Specific provider.
Choose the amount and schedule
Under Amount to collect, choose one model:
| Model | Fields |
|---|---|
| Full trip amount | Due date |
| Deposit per person | Deposit per person and Balance due days before trip |
| Split remaining balance into installments | Installments (up to 24) and Final due days before trip |
| Custom schedule (per person) | Fixed rows first; the last row collects the remaining balance |
Due dates can be a fixed date or a number of days before departure. Select Save schedule.
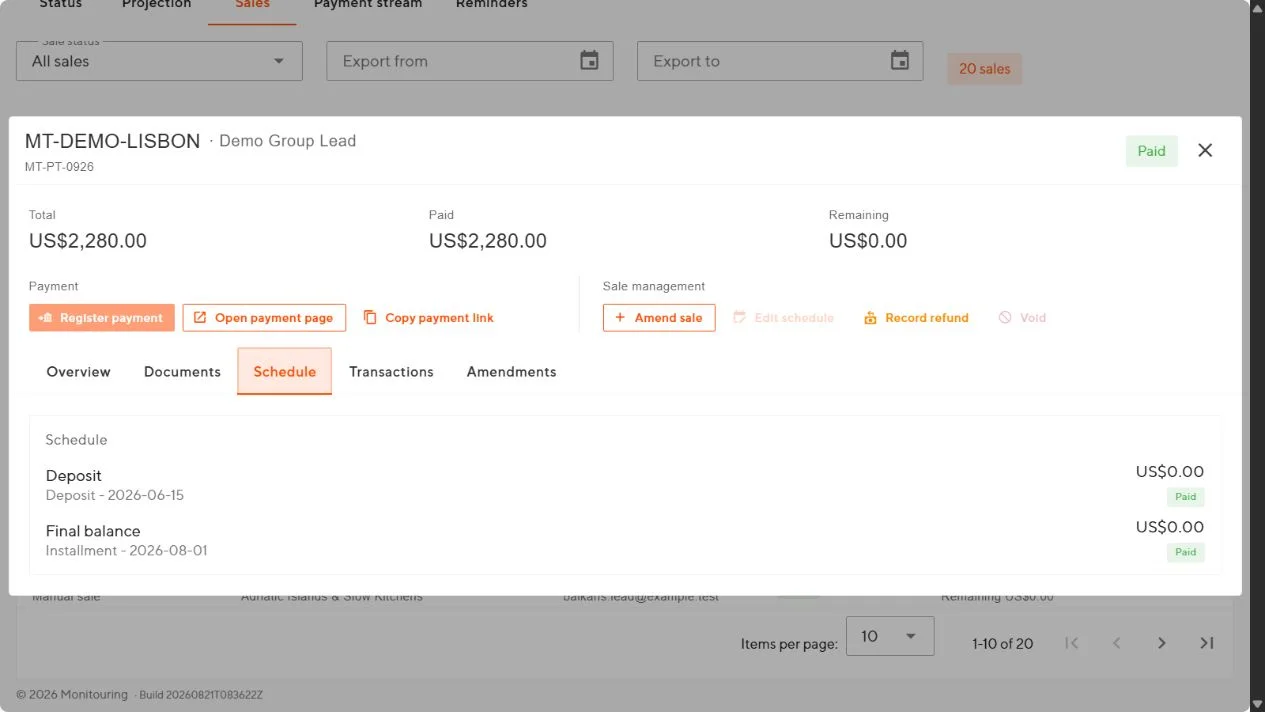
Changing the trip schedule applies to new sales. To update an existing sale, open it in Finance → Sales and use the reapply-schedule action.
Test it
- Publish the trip.
- Submit a test join request and complete the payment in the provider’s sandbox.
- Check the sale in Finance → Sales.
Travelers see the correct price and can pay through your provider according to the schedule.