
Browse the operator manual
Start here
Get started with Operations CenterTake a trip from Draft to departureUse Dashboard and RadarVideo guidesOrganization setup
Set up your organizationSet company identity and portal brandingSet editor, schedule, and writing defaultsConfigure traveler forms, legal content, and the public catalogConfigure payment providers and payment documentsConfigure automatic emailSet monitoring and notification thresholdsCreate and build
Create a tripImport a trip with AIComplete trip details and residencesBuild the itineraryAdd flights and transfersAssign field staff and partnersPublish and sell
Configure and publish the traveler portalDesign the traveler pageGive and remove portal accessConfigure pricing and collect paymentsReview and approve join requestsManage travelers and roomingWork with sales and FinancePrepare and operate
Prepare a trip for departureManage files and messagesMonitor live operationsSaved content and contacts
Reuse saved trip contentMaintain field staff, partners, and suppliersReference
Trip status referenceManage the tour listFix common problemsOrganization setup
Configure payment providers and payment documents
Connect a payment provider and set the numbering, logo, and footer for fee notes and receipts.
Before you begin
- Organization administrator access
- Provider account details from your finance team
You will learn to
- Enable and prioritize a payment provider
- Set fee note and receipt numbering
Reviewed September 2026
Connect a provider
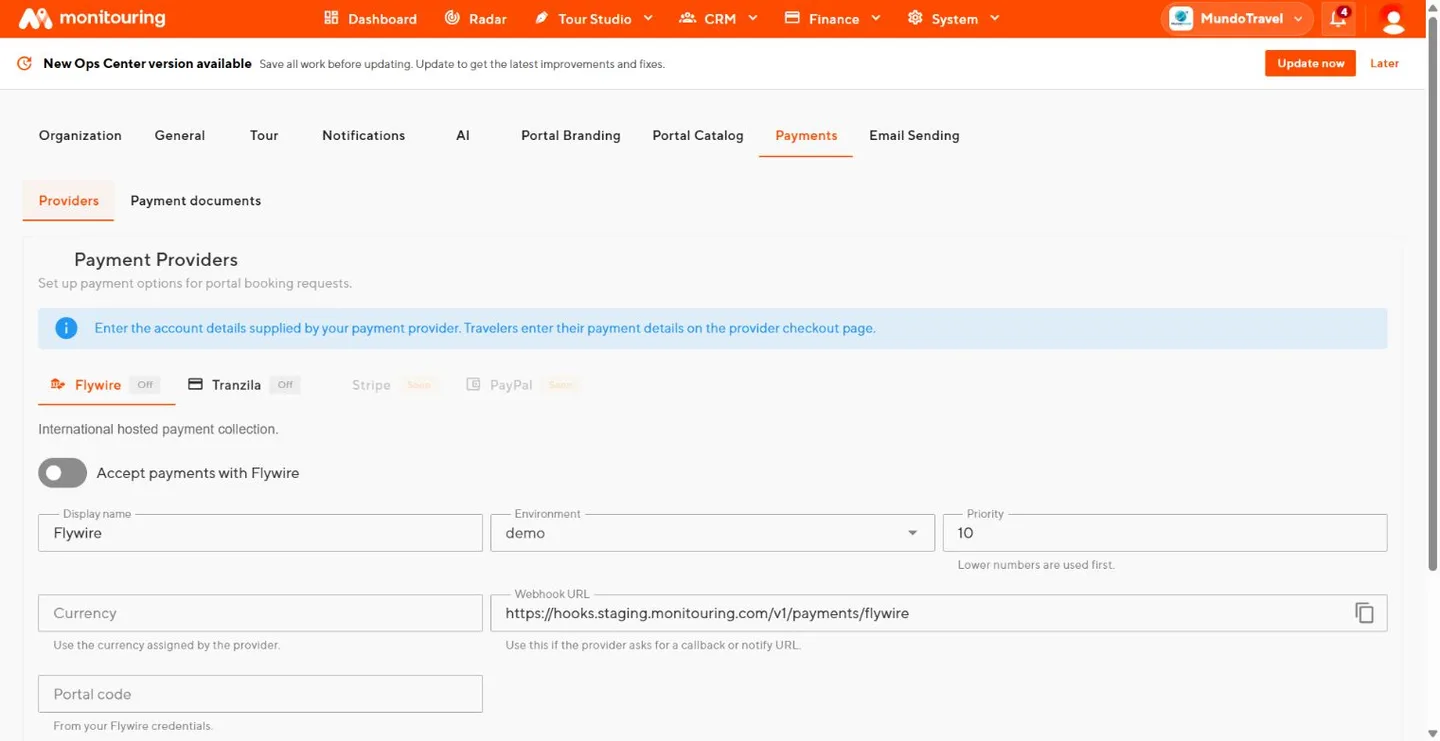
Open Payments → Providers and select a provider.
| Setting | Effect |
|---|---|
| Accept payments with… | Makes the provider available for trip payment collection |
| Display name | Name shown to operators and travelers |
| Environment | Sandbox or production |
| Priority | Order among enabled providers. A lower number is tried first |
| Currency | Currency for this provider |
| Webhook URL | Address to enter in the provider’s account when asked |
| Account and credential fields | Values supplied by the provider |
Copy values exactly as the provider supplies them. Select Save.
Never paste provider keys or secrets into trip notes, messages, or screenshots. If a value may have been exposed, replace it through the provider.
Test before going live
- Set Environment to sandbox and select Save.
- Create a Published test trip with a small price and turn on payment collection.
- Complete a test payment from the traveler page.
- Check that the payment appears in the trip and in Finance → Sales.
- Switch Environment to production when the finance team approves.
Enabling a provider does not turn on payment collection for existing trips. Each trip chooses its own collection settings in Payments.
Set fee note and receipt numbering
Open Payments → Payment documents.
| Setting | Effect |
|---|---|
| Fee note number format | Pattern for fee note numbers |
| Next fee note counter | Number used in the next fee note |
| Receipt number format | Pattern for receipt numbers |
| Next receipt counter | Number used in the next receipt |
| Document logo | Logo printed on fee notes and receipts |
| Document footnote | Business, tax, or contact text printed at the bottom |
Formats use one counter placeholder in braces. For example, REC-{C-6} produces REC-000001. Follow the example beside each field.
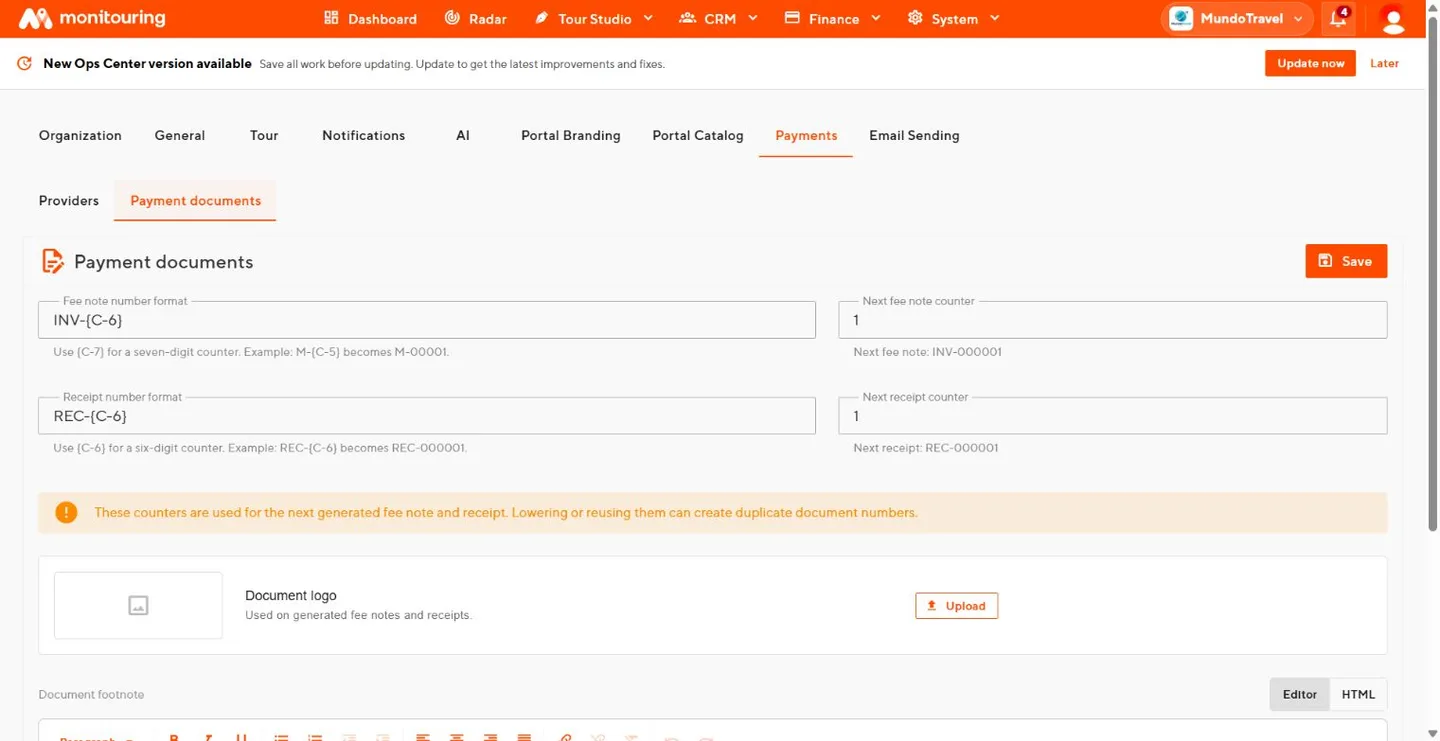
Lowering or resetting a counter can create duplicate document numbers. Agree the next number with accounting before changing a format or counter.
Trips can collect payments through your provider, and fee notes and receipts follow your numbering.